How to Format a USB Flash Drive Using Mac
For optimal performance with Amcrest devices, a USB flash drive must be properly formatted to FAT32. FAT32 (File Allocation Table) is a derivative of the file allocation table (FAT) file system. FAT32 supports smaller cluster sizes than FAT, thus providing more efficient space allocation and is ideal for larger disks sizes.
It is recommended to format a USB flash drive to FAT32 manually before use as most formatting systems will not format to this allocation automatically. For more information on how to externally format a USB flash drive using MacOS please refer to the information below.
Step 1: Insert your USB flash drive into a USB port on your computer.
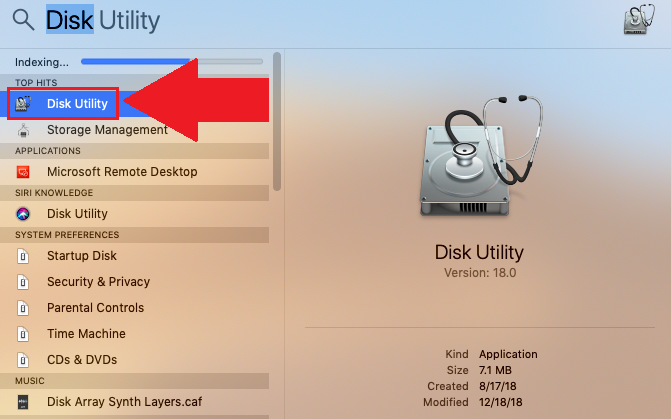
Step 2: Navigate to the "Spotlight Tool" (the magnifying glass) on your computer and locate the "Disk Utility" tool. This will be the tool used to format your USB flash drive. Double click on "Disk Utility".
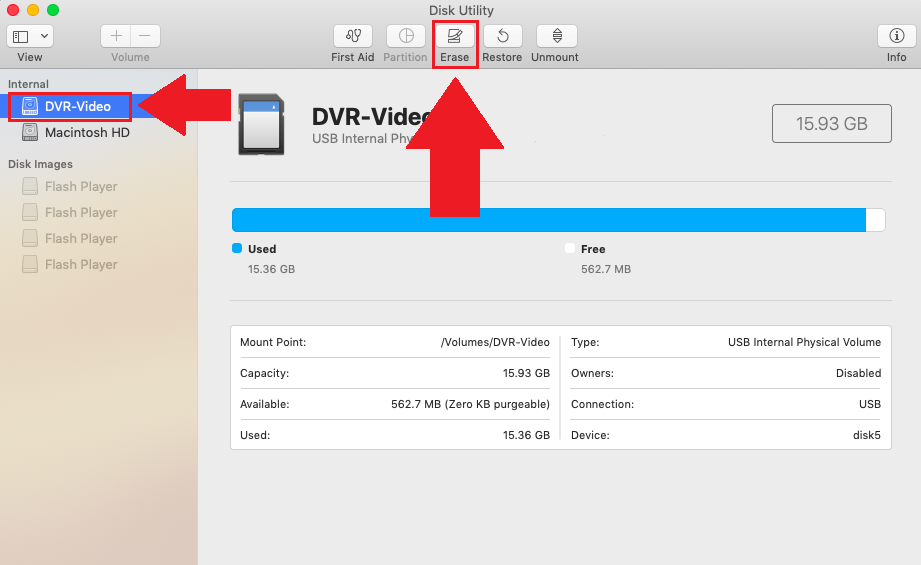
Step 3: In the Disk Utility tool, locate the inserted USB flash drive and click on it. You will notice information related to the USB flash drive in the utility. Click on Erase.
Step 4: In the Erase menu, click on the "Format" menu and select "MS-DOS (FAT)". This option will properly format your USB flash drive to FAT32.
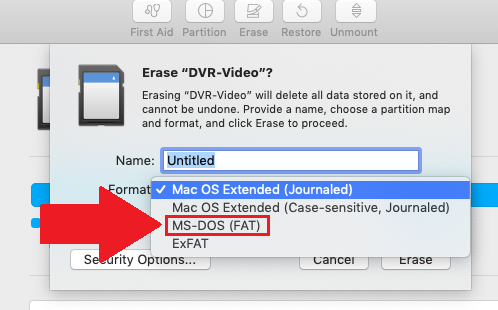
Note: In this example we will leave the name of the drive as "UNTITLED" however, you can name your device if you wish.
Step 5: Click on "Erase"
The disk utility will automatically begin formatting your USB flash drive.
Verify the USB Flash Drive is Properly Formatted
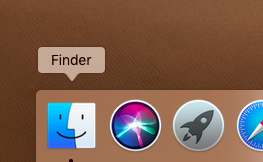
To verify you the USB flash drive has been properly formatted, close out of the disk utility and click on the "Finder" app.
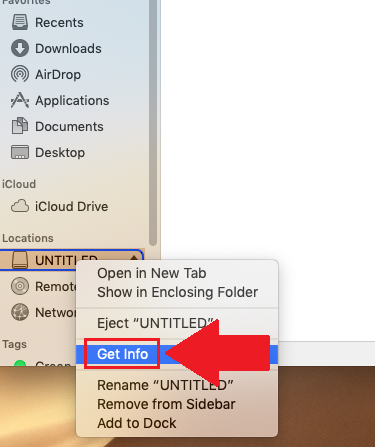
Under Devices or "Locations" locate your device. Right click on your device and click on Get Info.
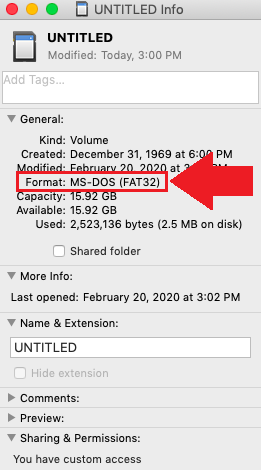
A list of information will be displayed for your device. In the format section it should read "MS-DOS FAT32". This indicates your USB flash drive has been properly formatted.
You may now remove the device from your computer and use it with your Amcrest device.
Comments
Please sign in to leave a comment.