Battery Camera Setup
Note: The battery camera and smart hub can only be accessed via the Amcrest Smart Home app. The device is not able to be viewed via Amcrest NVRs, Blue Iris, or any other surveillance software. For more information on how to setup your battery camera, please refer to the information provided below.
Step 1: Open the Amcrest Smart Home app and tap on “Register” to register an account. After registering an account, log into the app and tap on “Add Device”.

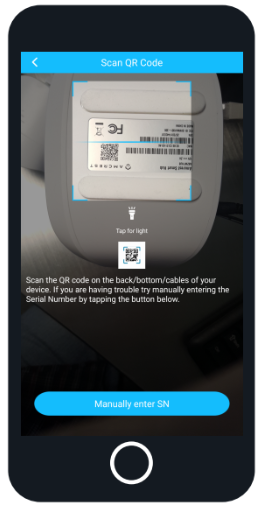
Step 2: Scan the QR code located on bottom on your smart hub. If you are unable to scan the QR code you can manually enter the serial number by tapping “Manually enter SN”. The serial number can be found on the serial tag on the bottom of the smart hub.
Step 3: Connect an Ethernet cable into the Ethernet port on the back of your smart hub and connect the other end of your cable to your router. Apply power to the smart hub and allow the device to boot.
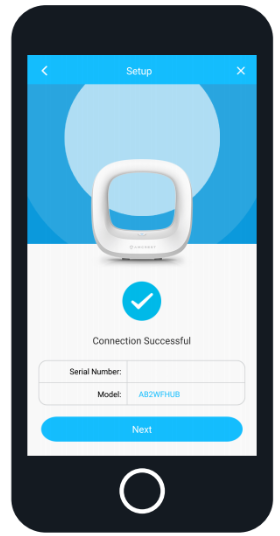
Please make sure that your phone and smart hub are on the same Wi-Fi network. The LED on the smart hub will flash, once a proper connection is made the LED will disappear and you will be ready to start adding cameras. Tap “Next” to continue.

Step 4: Create a password. This will be the password for your smart hub. Enter a password with a minimum of 8 characters using a combination of upper/lowercase letters and numbers and confirm. A recovery email can also be entered in case you forget the password for your device. Tap “OK” to continue.

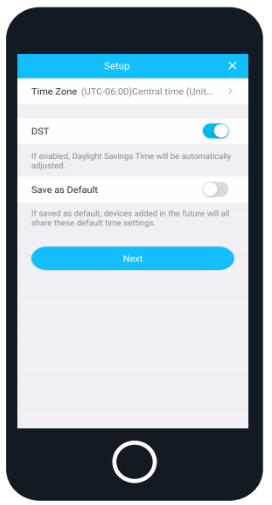
Step 5: Set the “Time Zone” to your current time zone and set “DST” (Daylight Savings Time) settings if applicable. If you would like to have these settings saved as default to be added to future devices, you can toggle the “Save as Default” switch to the on position. Tap “Next” to continue.
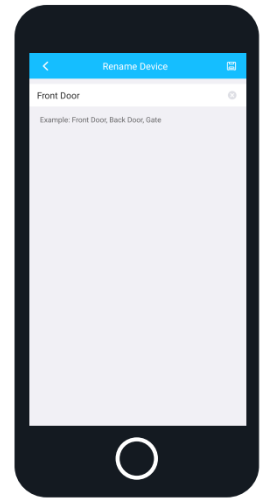
Step 6: Give your device a name. A few examples are provided such as; Front Door, Back Door, Office, can be selected if needed. After you have named your device, tap on the save (  ) icon to continue.
Step 7: The smart hub has now been added to your Amcrest Smart Home app! You can now begin pairing cameras to the smart hub. Setup Is Complete! Tap “Next” to continue.
Pairing your Cameras
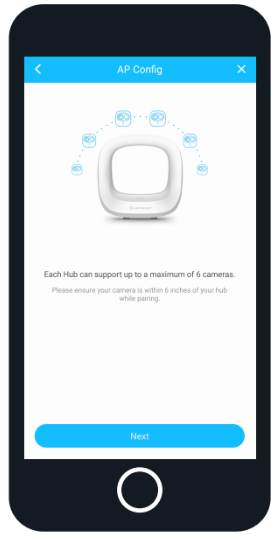
Step 1: Each smart hub can support up to a maximum of 6 battery cameras. Please ensure your camera is within 6 inches of your hub while pairing a camera. Tap “Next” to continue.
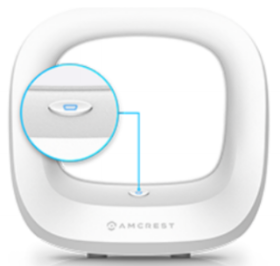
Step 2: Press the Sync button on the front of the smart hub. Once pressed, an indicator LED on the hub will begin to flash.
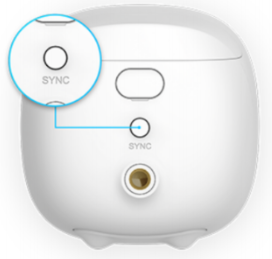
Press the Sync button on the back of the camera. A green indicator light on the front of the camera will begin to flash indicating the camera is pairing to the smart hub. Once the LED lights on the smart hub and camera have both disappeared, the camera has been successfully paired.
Tap “Next” in the app to continue.
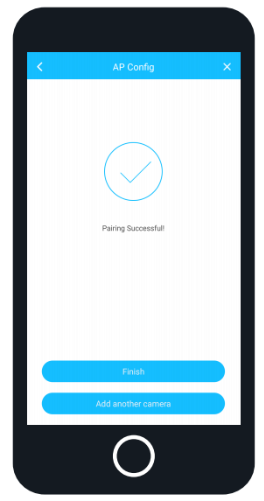
Step 3: The camera has now been successfully paired to the smart hub. If you would like to add additional cameras, tap on “Add another camera” and repeat the pairing process. If you are done pairing cameras, tap on “Finish”.
Note: If you are pairing additional cameras, tap on “Add another camera” and repeat the pairing cameras process previously described.
Comments
Please sign in to leave a comment.