How To Physically Install a Battery Camera
The physical installation of your camera will involve the following items.
- SCREWDRIVER - A Phillips head screwdriver will be needed to mount your camera.
- DRILL - A drill may be required if installing the camera on concrete, stucco, or a brick mounting surface.
- INSTALLATION POSITION MAP - This will be included in the box and will provide a template for the physical installation of your camera.
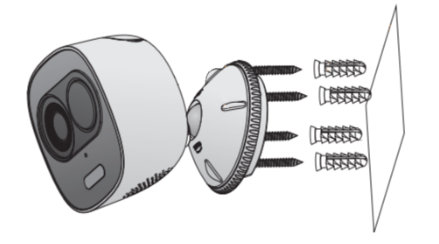
- WALL ANCHORS - Used to secure the mounting screws into the mounting surface.
- MOUNTING SCREWS - Used to mount the camera to the mounting surface.
Note: A 15/64’s drill bit may be required to drill the holes for the wall anchors.
Installing the Camera
Place the installation position map onto the mounting surface and using a drill, drill the marked holes. Place the wall anchors into the holes. Next, turn the mounting bracket in a counterclockwise motion to remove it from the camera. Then, remove the bottom bracket from the top bracket by twisting in a counterclockwise motion.
Place the bottom bracket onto the installation map aligning the holes to the wall anchors. Secure the bracket using a Phillips head screw driver and mounting screws. Place the camera back onto the security screw of the top mounting bracket and turn in a clockwise motion to secure it to the camera. Place the top bracket back onto the bottom bracket and turn in a clockwise motion to tighten and secure the camera to the mounting surface.
Comments
Please sign in to leave a comment.