How To Setup Recording Schedules In Surveillance Pro.
The Amcrest Surveillance Pro software allows you the opportunity to set your added device to record on motion or on the continuous (general) recording schedules. You can also set recording schedules for your device.
Storage
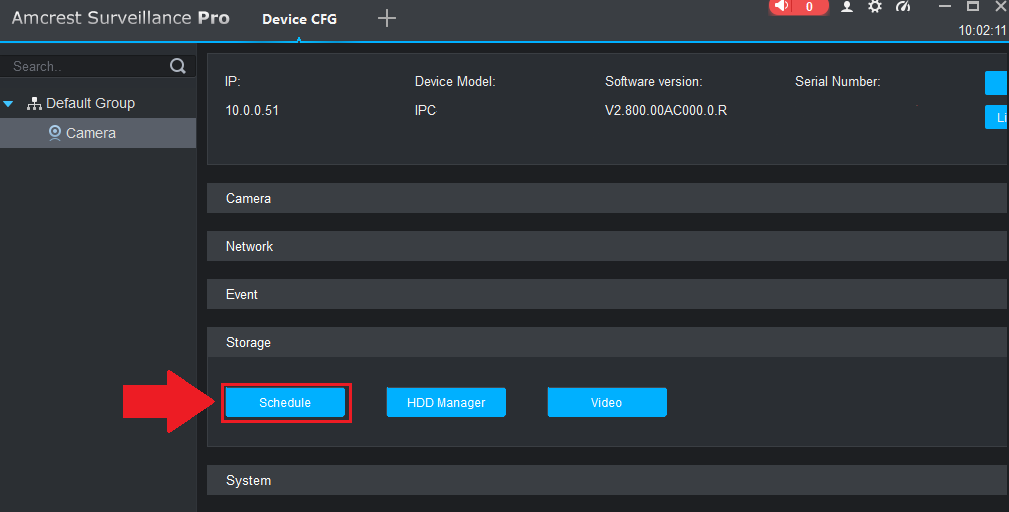
To begin setting up recording settings for your device, a microSD card or PC-NVR must be established to store the recordings. When a storage device has been established in your device, navigate to the Home Page and click on the Device CFG icon in the settings menu. Select the device you wish to configure and in the Storage field, click
Below is a description of the fields listed in this menu:
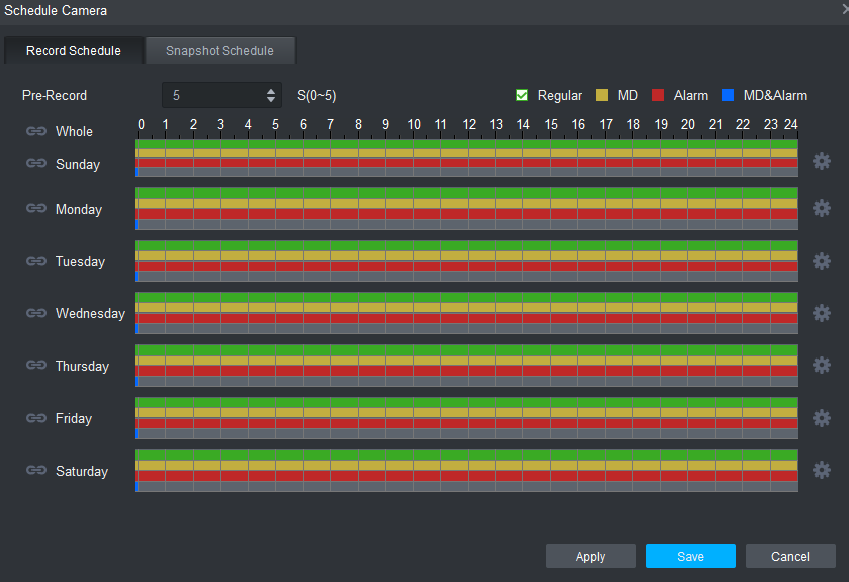
Regular: Regular sets your device to continuously record, 24/7. This field is designated by green color in the software.
MD: MD, or Motion Detection recordings, are set to set your device to record on motion detection. This field is designated by a yellow color in the software.
Alarm: Alarm recordings are set to set your device to record only when a specific alarm is triggered. This is designated by a red color in the software.
MD&Alarm: MD&Alarm, combine both motion detection and alarm settings into one specific attribute. This field is designated with blue color in the software.
To begin setting a record schedule for your device, click on the  icon next to the day you want to schedule your record plan.
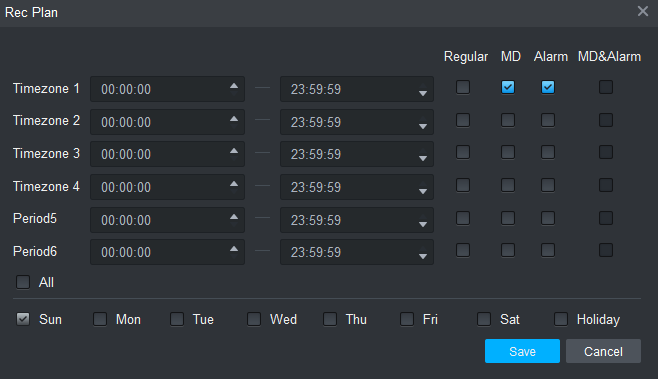
Clicking this button opens a screen that allows for recording periods to be set for each day and for each recording type. There are a total of 6 periods that can be set. To set a recording schedule, select the record type (Regular, Motion, Alarm, MD&Alarm, Smart) and select the times you would like your schedule to apply. If you would like the record type to record 24/7 the period will remain on 00:00:00 – 23:59:59.
Next, select which days you would like the schedule to apply with and click Save to continue. If you would like the schedule to apply to all days, click the All button. On the main record menu, click on Apply and Save to save the schedule to the software.
For more information on how to view playback of your scheduled recordings, click here.
Comments
Please sign in to leave a comment.