How to Enable Audio for an IP Camera Using an NVR
Due to specific regulations most IP cameras sold by Amcrest that feature a built-in microphone will have the microphone disabled by default. These options however can be enabled manually by using the IP camera's and NVR's web user interfaces (web UIs) using a common web browser. For more information on how to enable audio for an IP camera using an NVR, please refer to the information provided below.
Step 1: Log into your NVR's web UI using a web browser and ensure that the IP camera is properly registered to your NVR. For more information on how to access your NVR's web browser, click here.

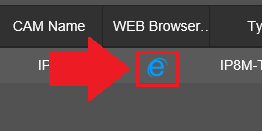
Step 2: Once the camera is confirmed to be registered properly, locate the Web Browser column and click on the "e" icon to load the web UI for your camera.
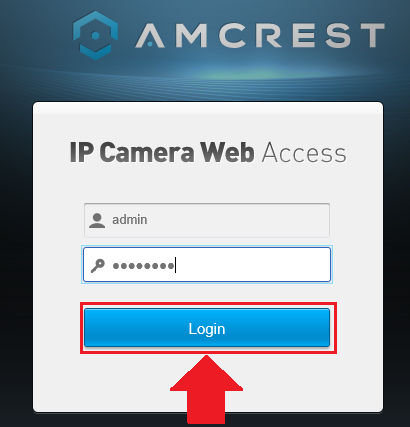
The web UI for your connected camera will be displayed. Enter the password for your camera and click Login to access the interface.
Please note, if your camera is not supported in the web browser you are using, please try another main stream browser such as Google Chrome, etc. to access the interface.
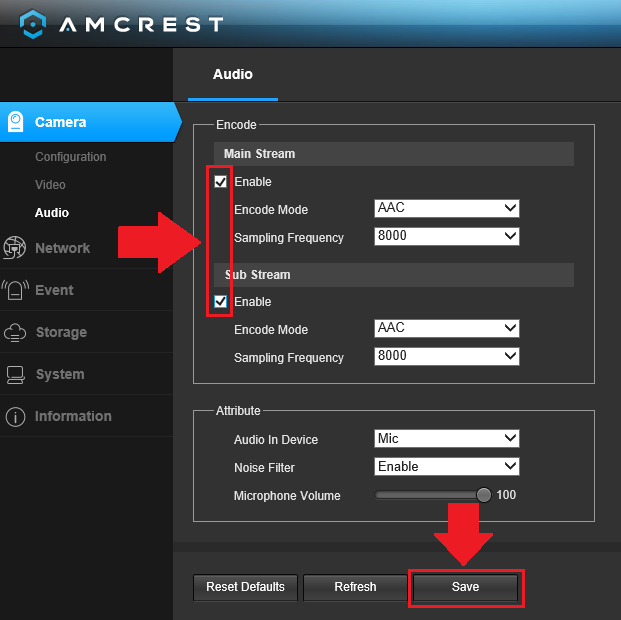
Step 3: In the camera's web UI, click on Setup>>Camera>>Audio and ensure the audio settings on both the main stream and sub stream are enabled on the camera. Click Save.
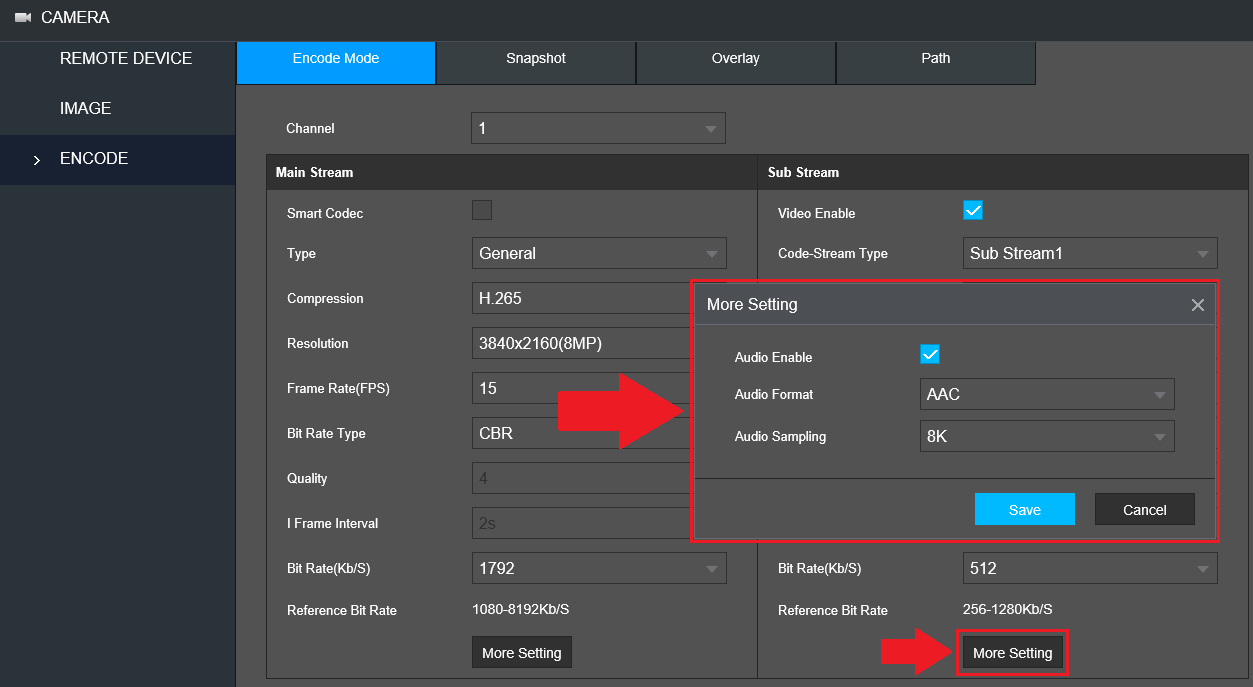
Step 4: Navigate back to the web UI for your NVR and click on Encode. Ensure the proper channel is selected in the interface and click on the More Setting button in the Main Stream column to access audio options. Ensure the Audio Enable checkbox is enabled and click Save.
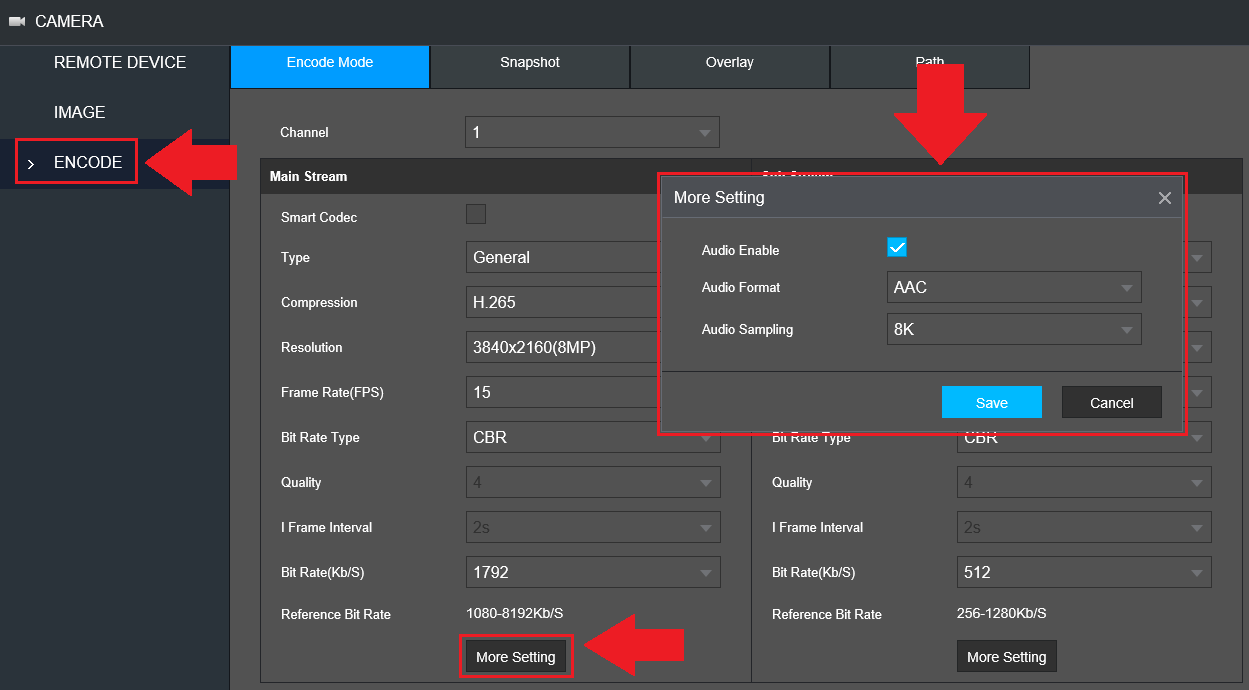
Ensure the same settings are enabled for the sub stream side as well. This is to ensure if you are viewing a sub stream feed the audio is still being produced by the camera.
Comments
Please sign in to leave a comment.