How To Insert a MicroSD card (IP8M-T2499EW)
Before inserting a microSD card into your camera, please make sure the camera is unplugged from power. For weatherproof reasons, the microSD card slot is located inside the camera body. This requires disassembly to access it. For more information on how to access the microSD card slot, follow the instructions provided below.
Note: You will need a Phillips head screwdriver and the included star tool to complete the process.
Step 1: Using the provided star tool, loosen the locking pin of the housing and remove the camera.

Note: Only 3 or 4 turns are needed as the screw will come out if loosened all the way. Remove the housing from the base ring and slide the base ring down to remove the camera.

Step 2: Using a Phillips head screwdriver, remove the 3 screws on the back of the camera.

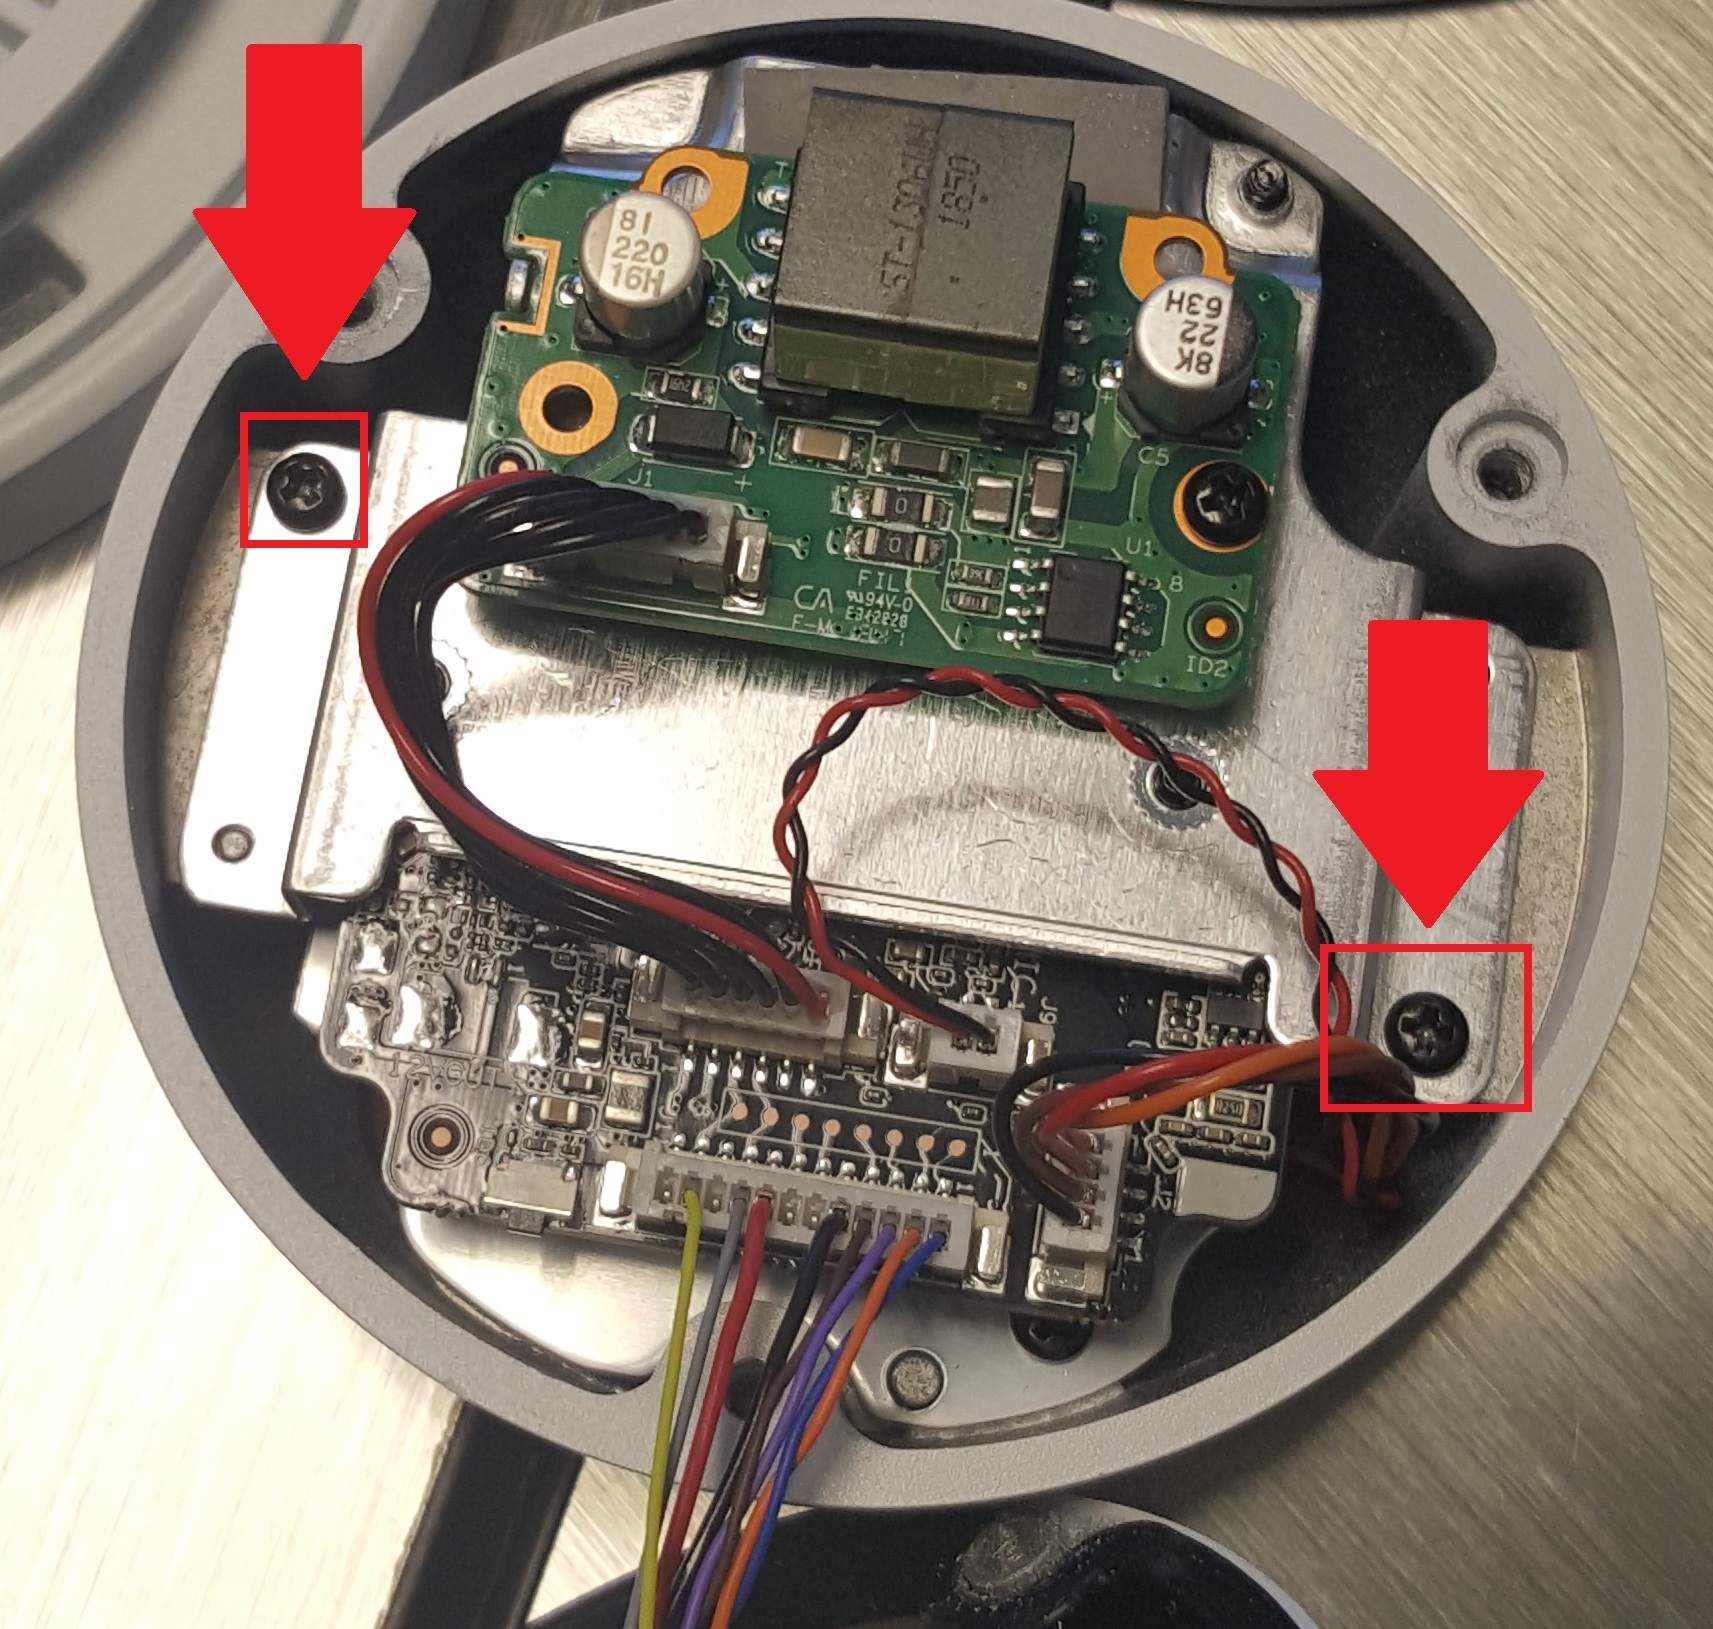
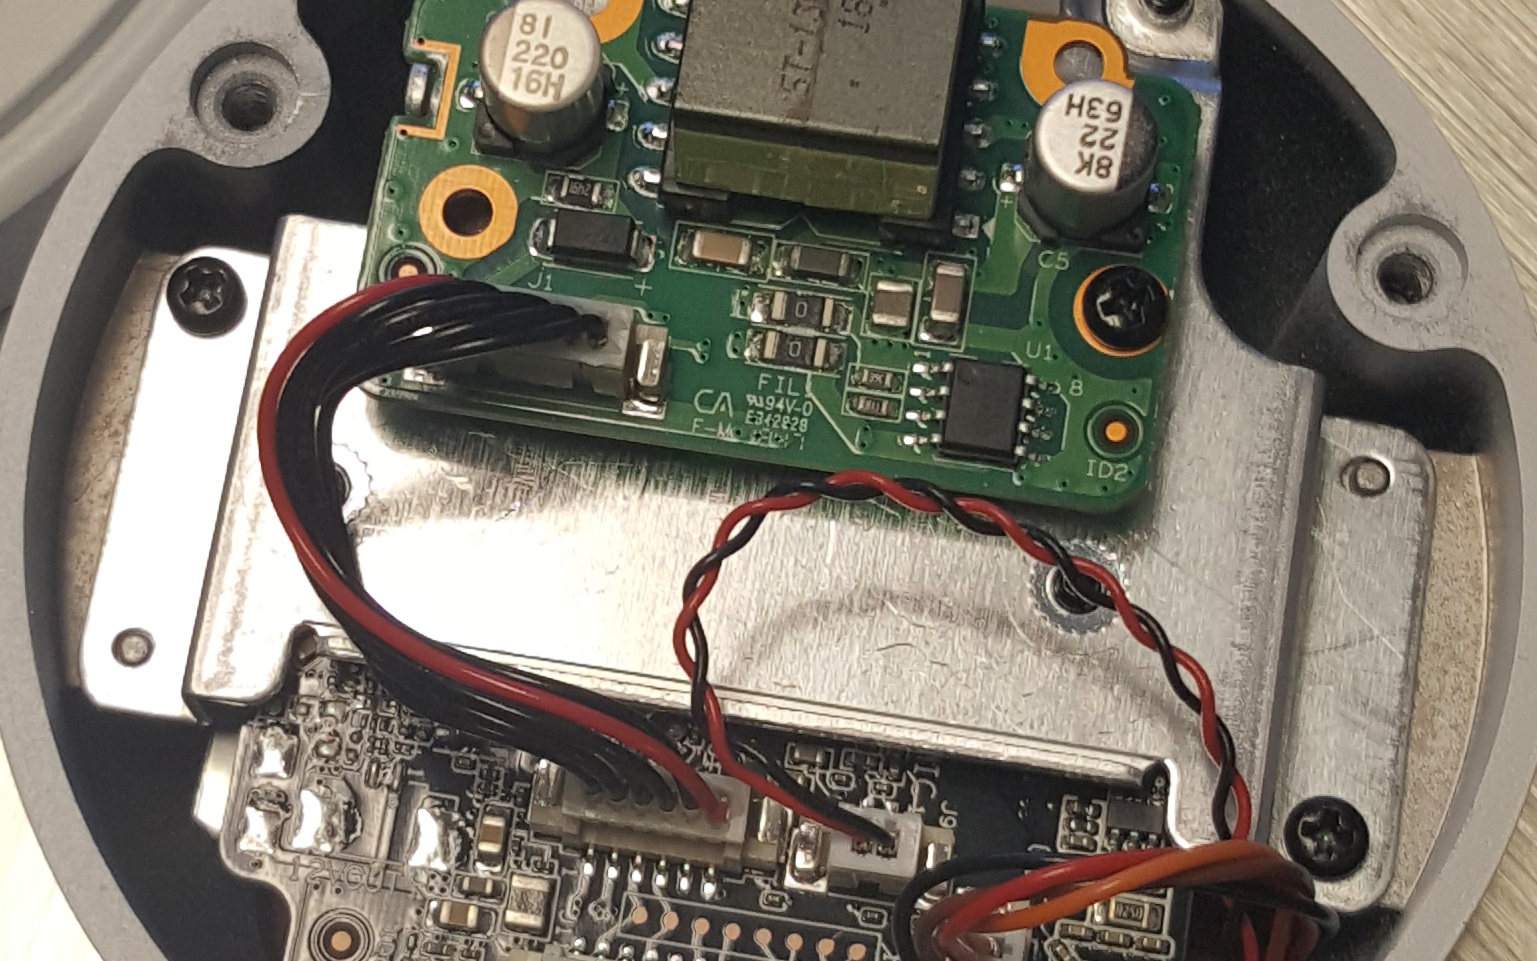
Step 3: Using a smaller screwdriver, remove the 2 black screws holding the motherboard of the camera to the body of the camera.
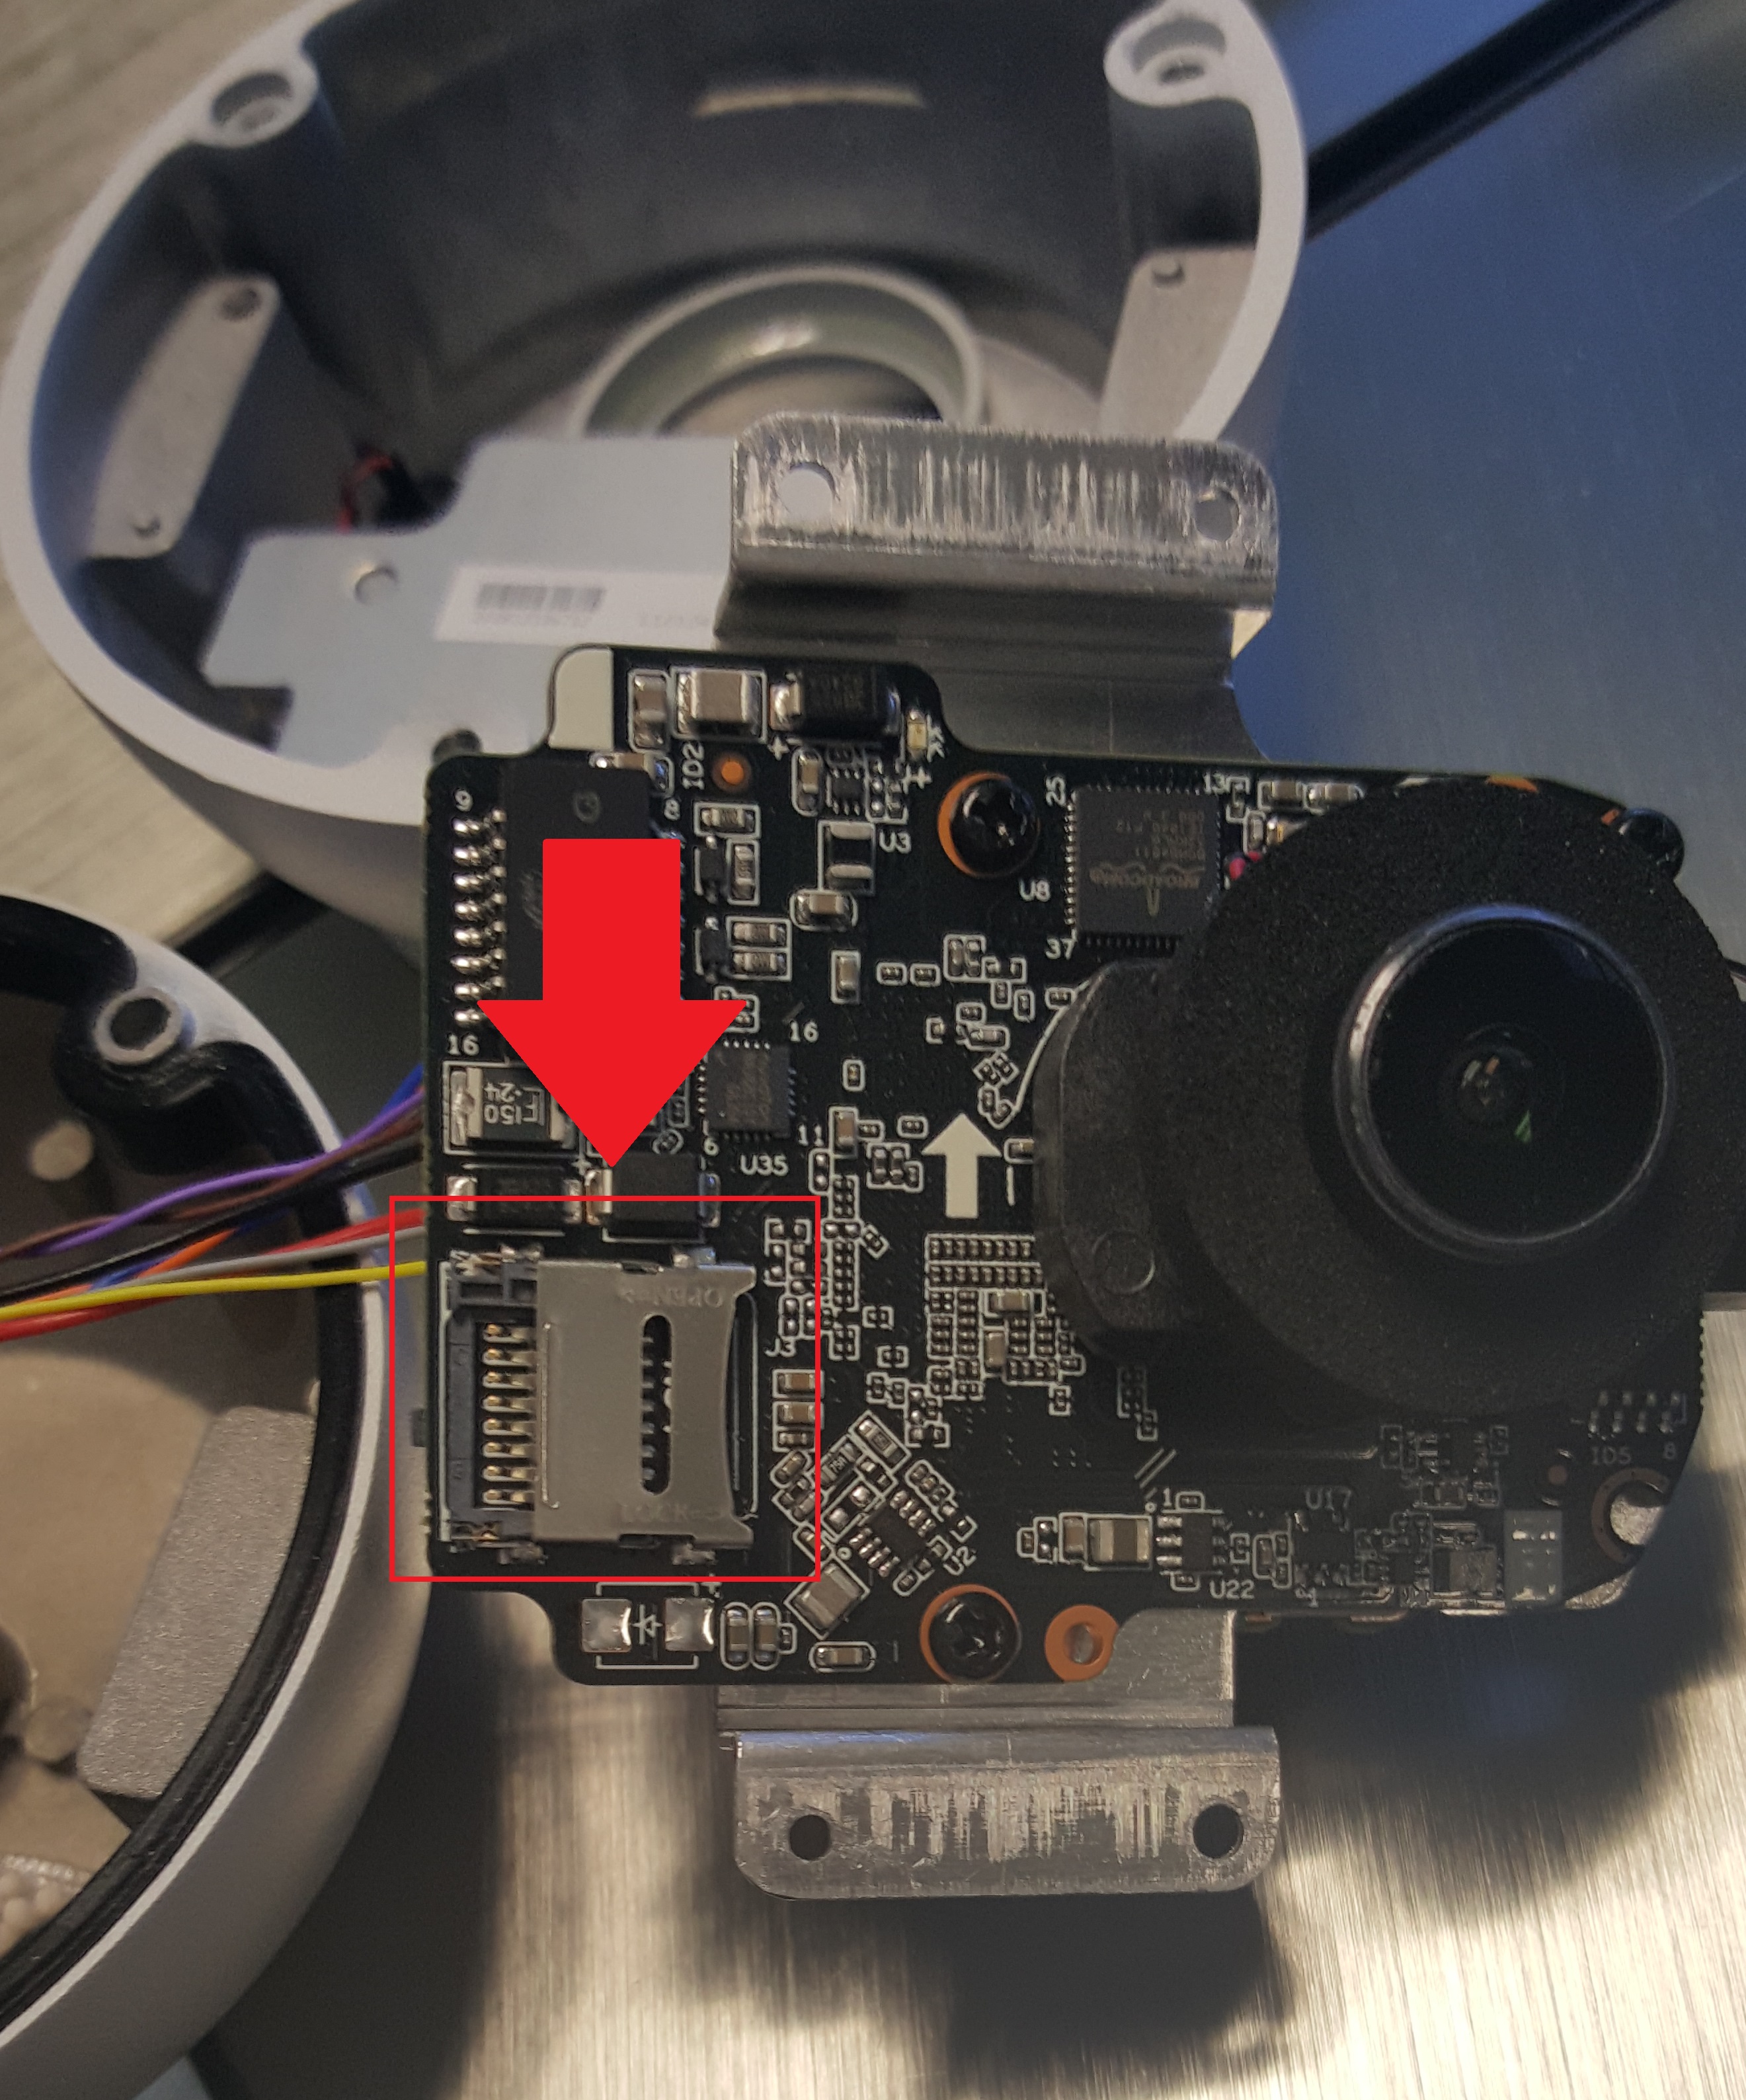
Step 4: The microSD card slot if located on the front of the motherboard as shown in the image below. Make sure not to touch the lens of the camera to avoid smudges or dirt from impairing the lens.
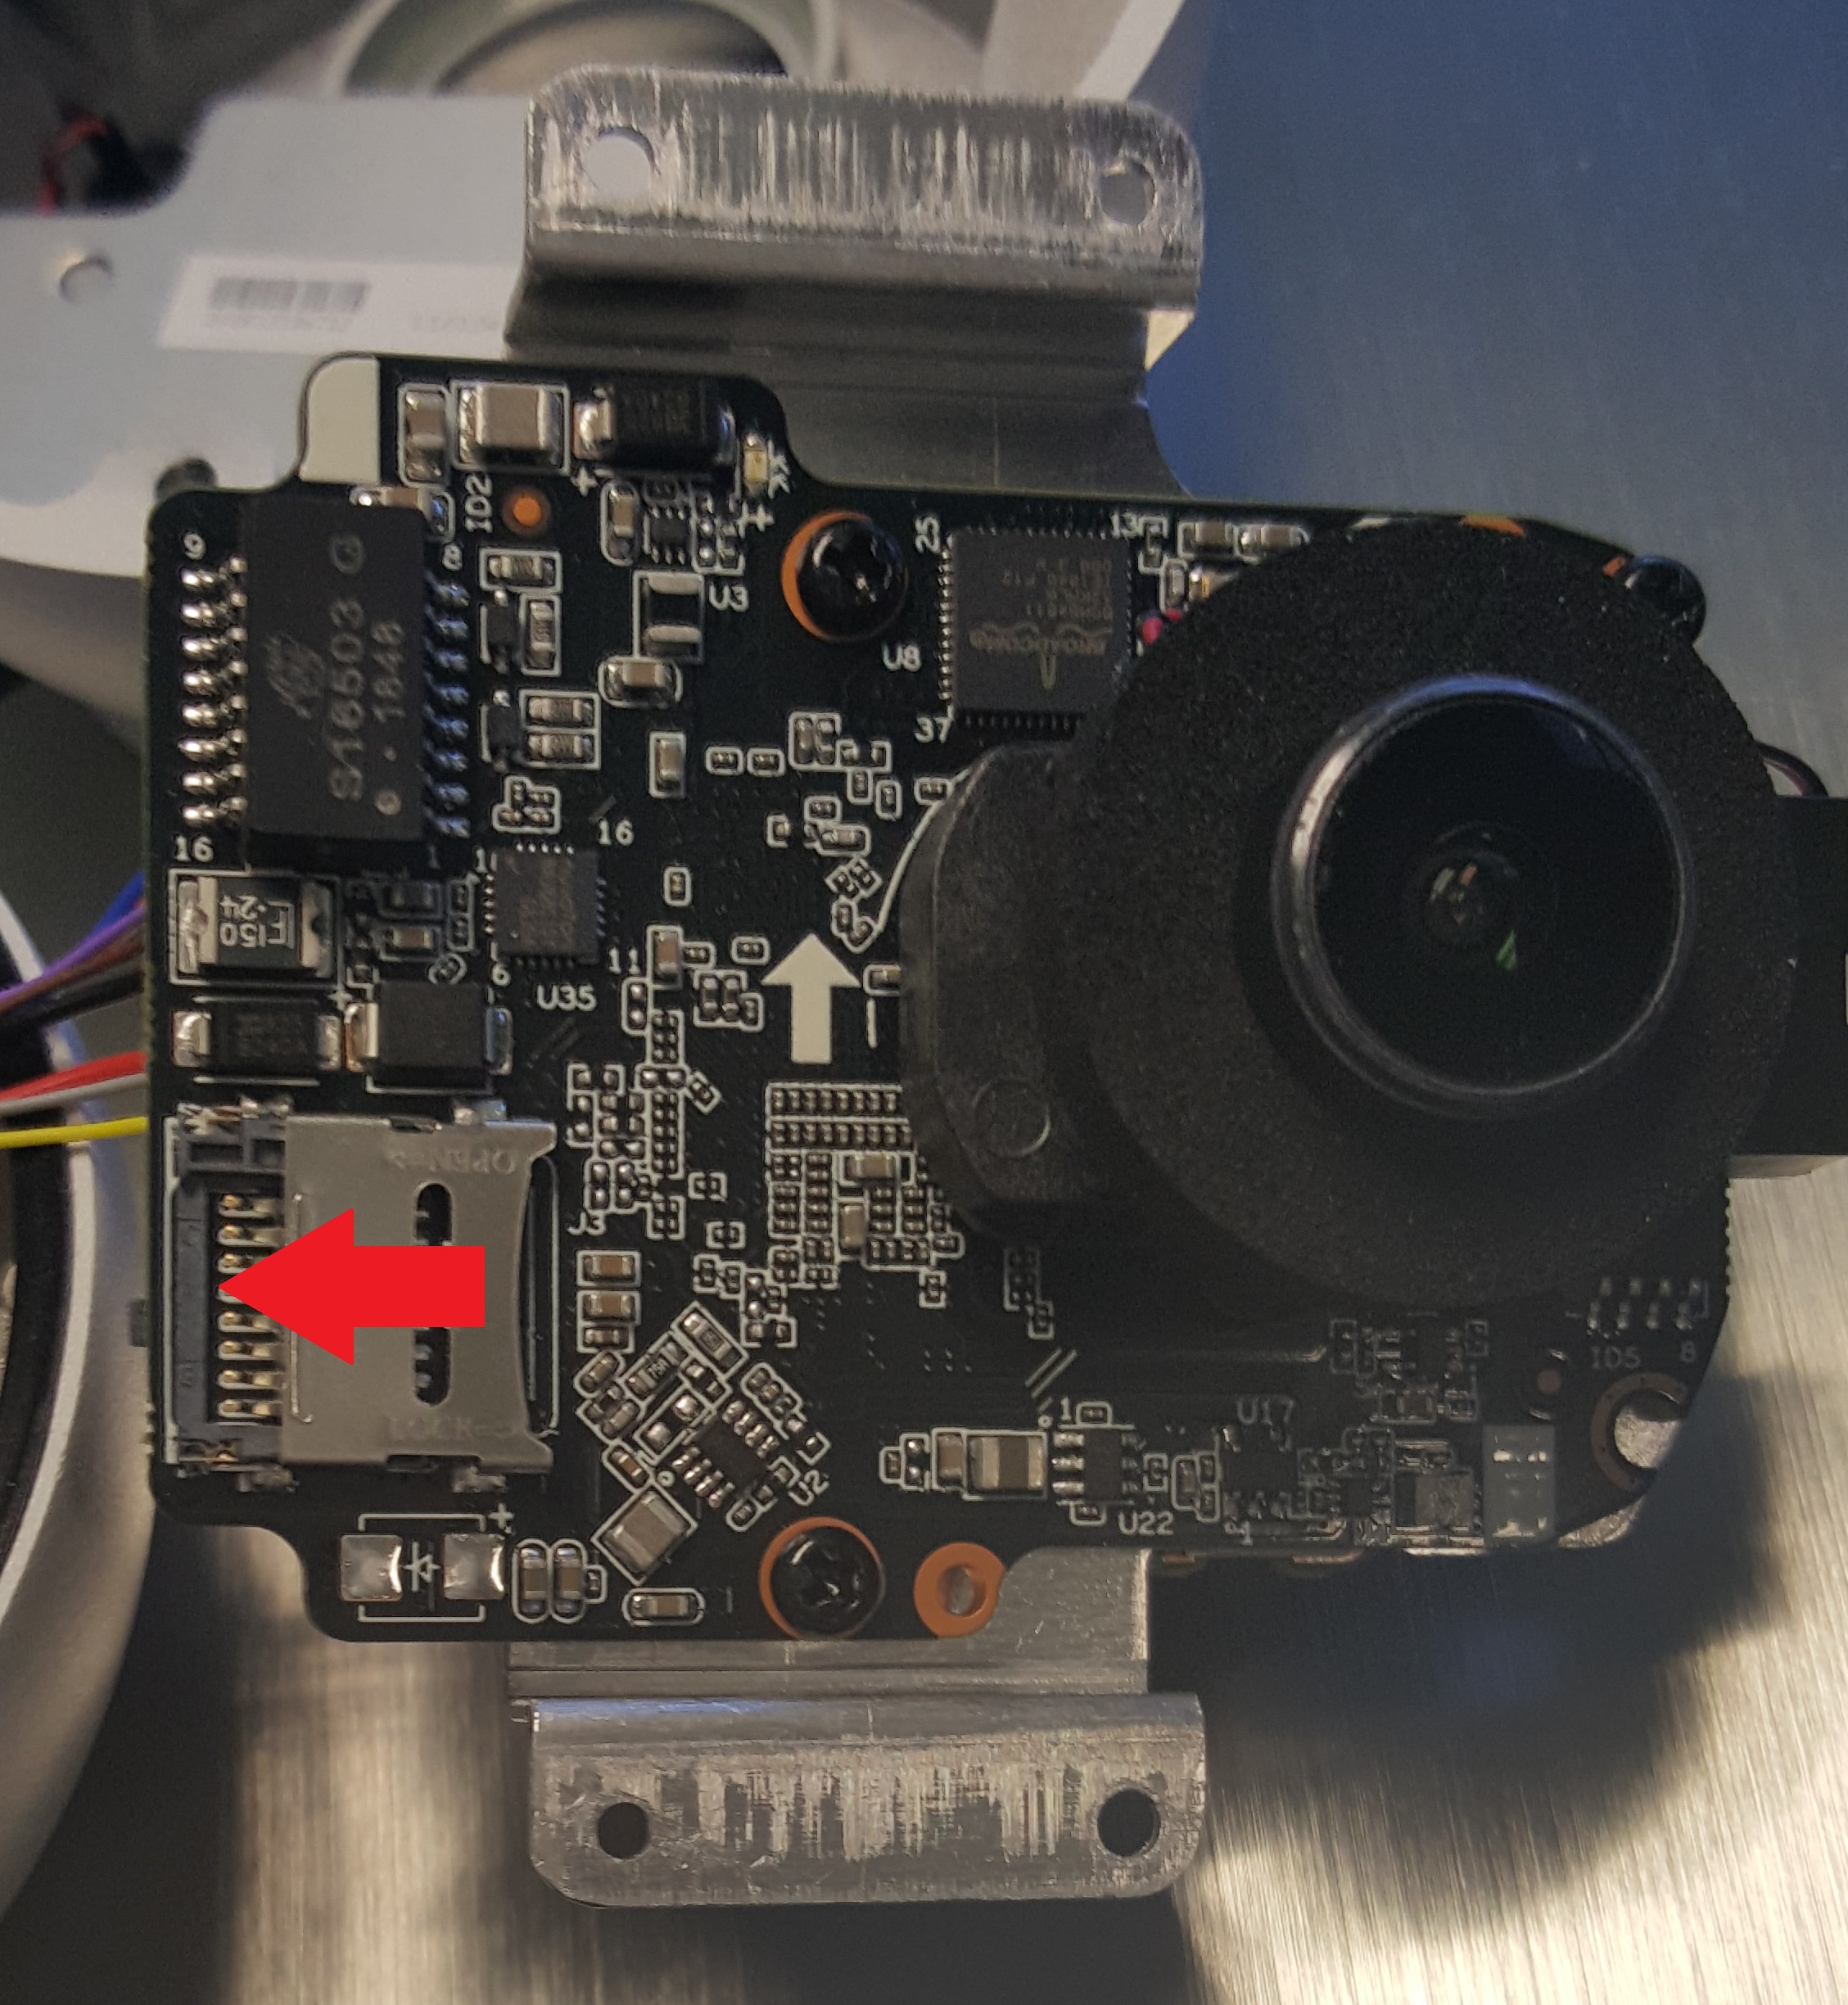
Step 5: Open the clasp of the microSD card by carefully sliding the clasp forward.
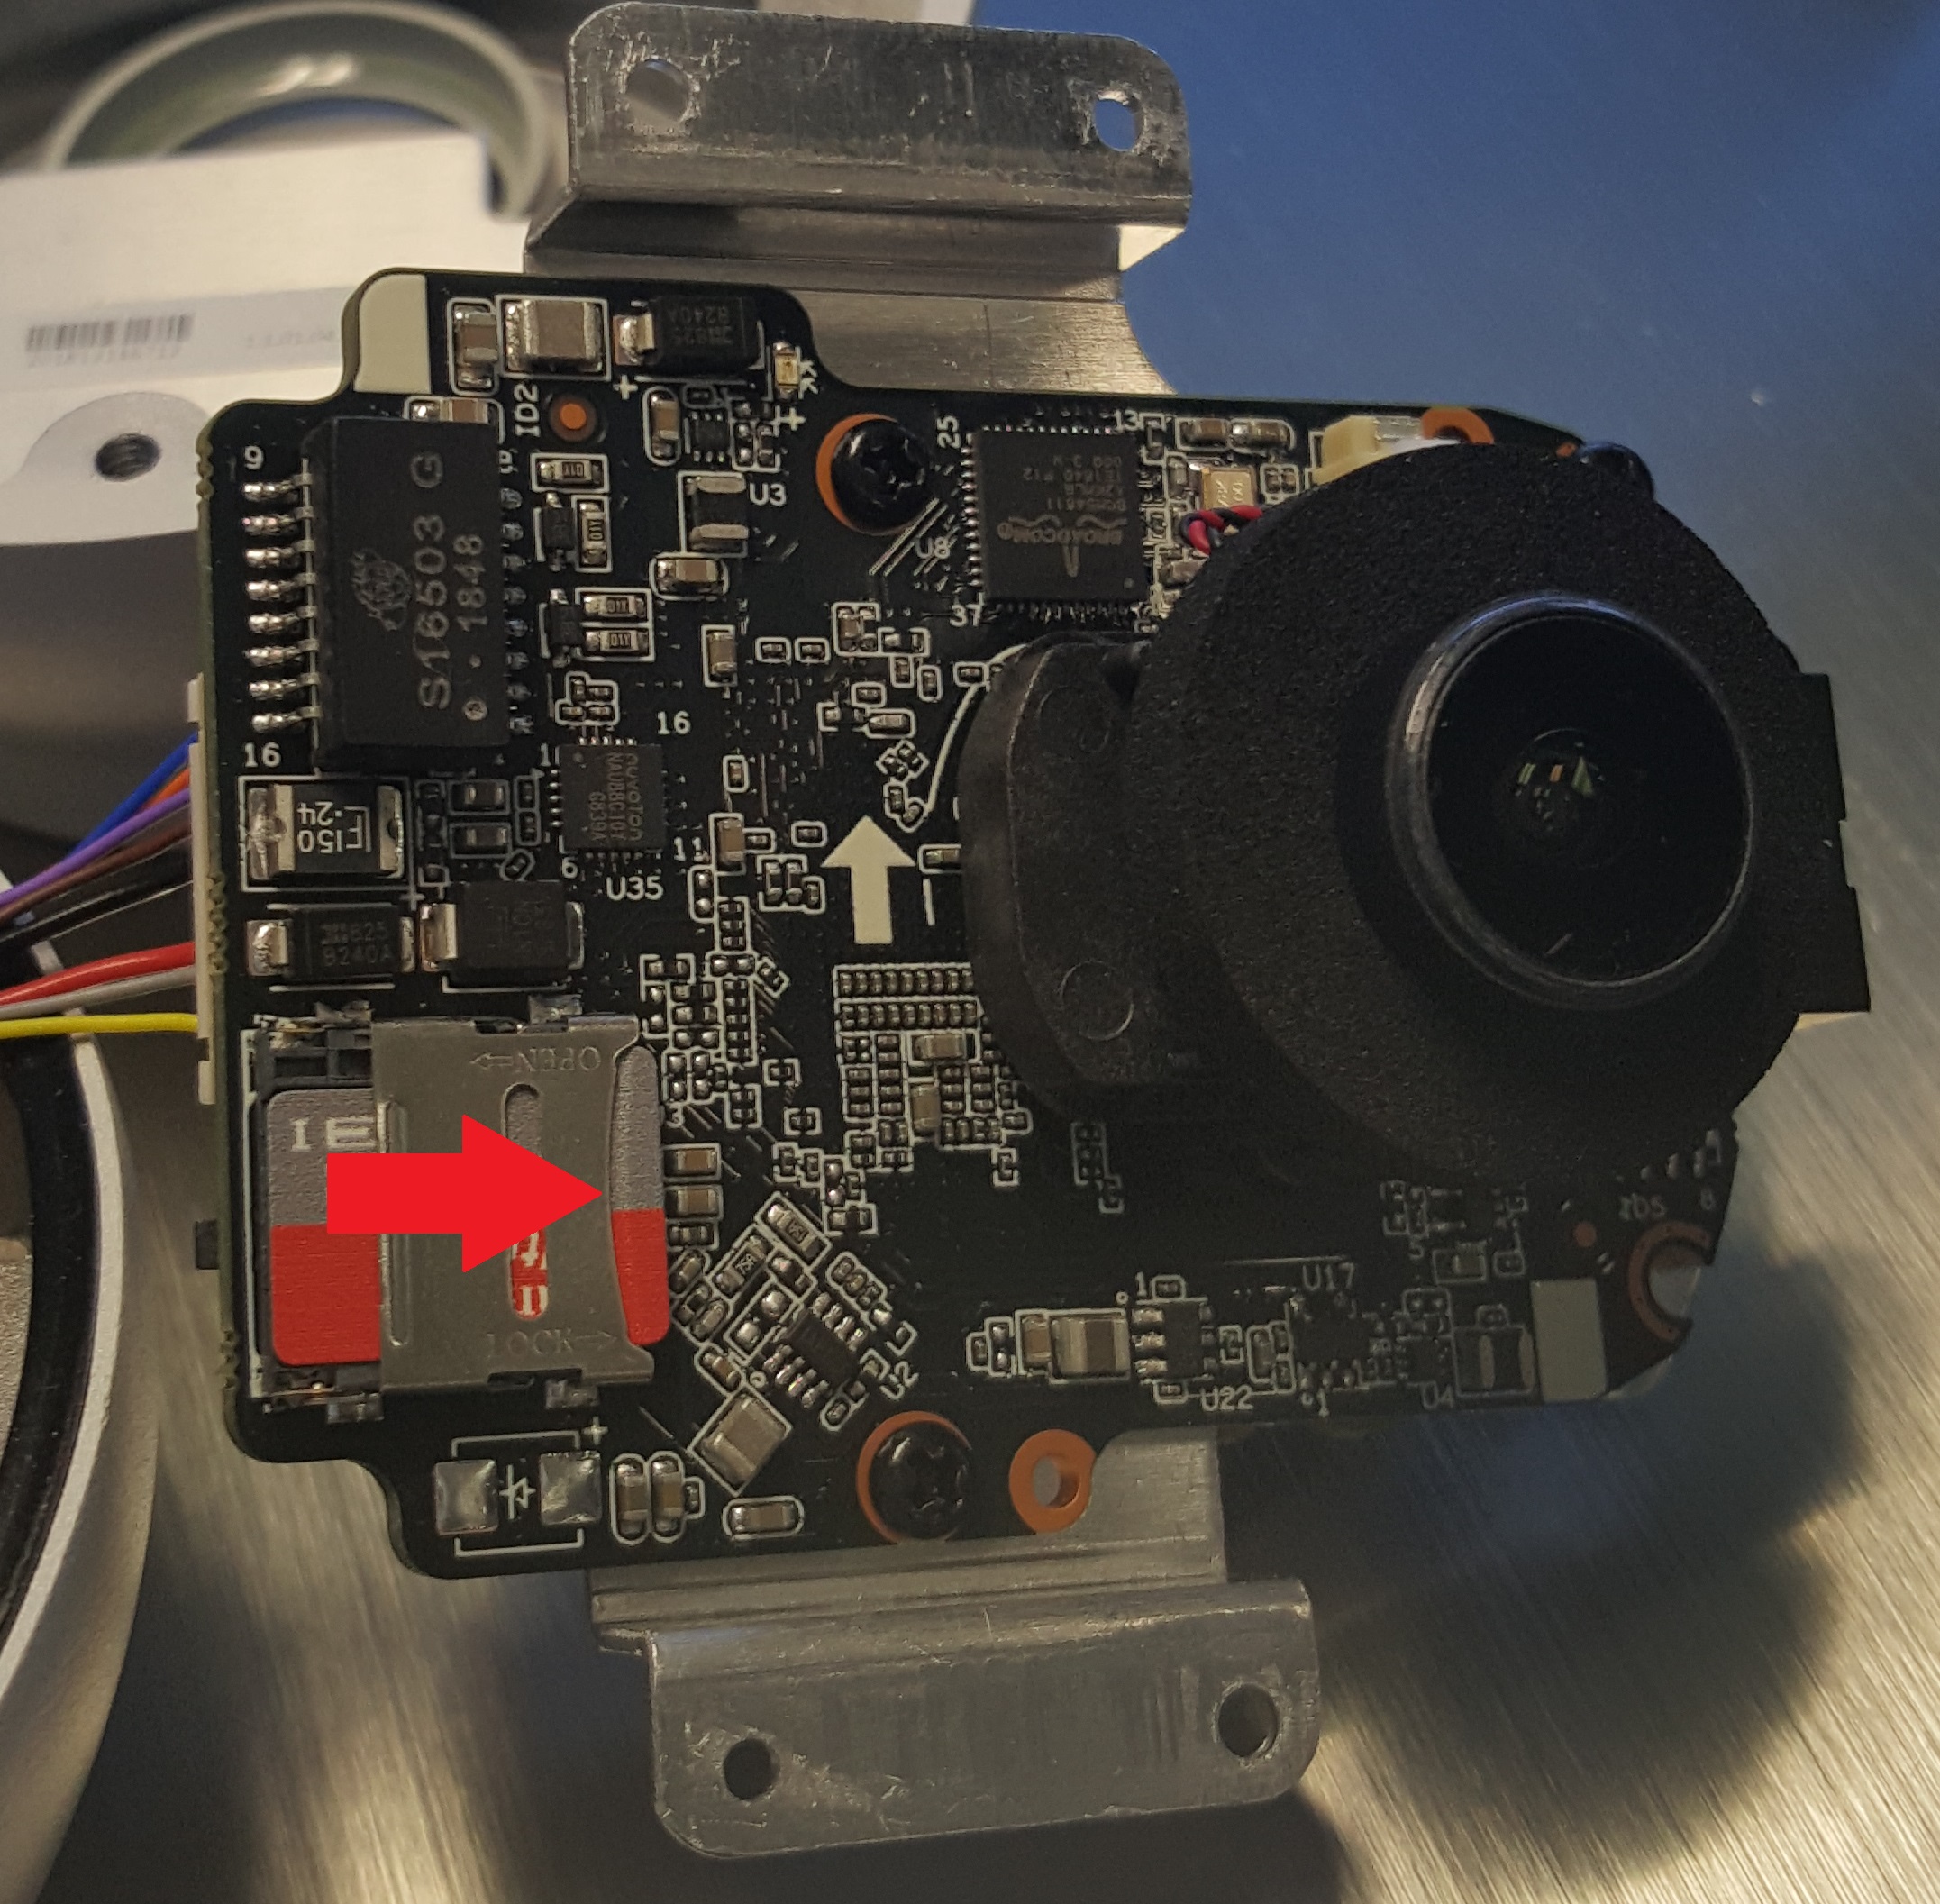
Step 6: Place a microSD card (no larger than 128GB) into the microSD card tray of the camera and align the gold pins of the clasp with the pins of the card. Carefully place the clasp onto the microSD card and lightly push the clasp backward to secure the card to the slot.
Step 7: Place the motherboard back onto the body of the camera and secure the bracket onto the body of the camera.
Step 8: Close the camera by aligning the two protruding screw openings on the back side with the two recessed counterbore holes on the front side. Ensure the heat conductive pad makes contact with the metal body. Then insert and tighten the 3 screws onto the back of the camera.
Step 9: Run the cable of the camera through the base ring and place the camera body onto the base ring. Place the housing frame over the camera body and against the base ring. Use the star tool to secure the housing back onto the base ring.

For an instructional video on how to insert a microSD card into your IP8M-T2499EW, please refer to the video provided below:
Comments
Please sign in to leave a comment.