Installing an Amcrest Chime Kit
The Amcrest Chime Kit is used to regulate the power to your existing chime so that your doorbell will function properly. The chime kit must be installed before the physical installation of the doorbell. For more information on how to install the chime kit, please refer to the information provided below.
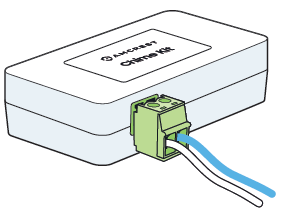
Step 1: Connect the wire harness to the chime kit
Step 2: Turn off the circuit breaker for your doorbell. Since we will be working with electrical wiring, it’s important to shut off the power to your doorbell at the electrical breakers of your home to ensure no power is flowing through the doorbell system.
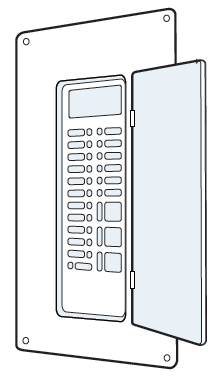
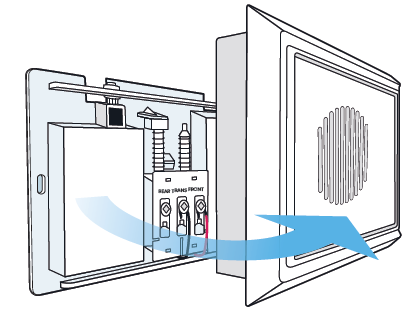
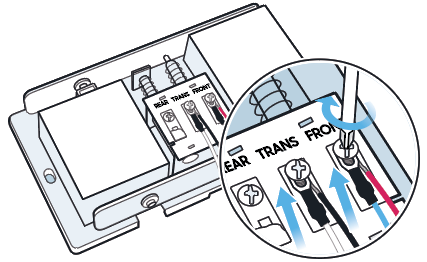
Step 3: Remove your existing chime cover. Look for two connected wires. They may be labeled “FRONT” and “TRANS”.
Note: Your existing chime may look different, depending on if you have a digital or mechanical chime.
Step 4: Loosen the screws on your existing chime. Using the included screwdriver, loosen the screws labeled “FRONT” & "TRANS”. If there are no labels, simply loosen the two terminals that have existing wiring attached.
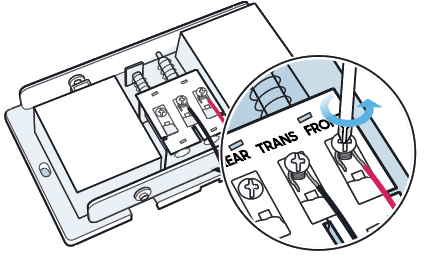
Note: Be careful not to detach or remove the existing wiring.
Step 5: Slide the connecting wires from the Amcrest chime kit underneath the screws, then retighten the screws. It doesn’t matter which wires connect to which terminal.
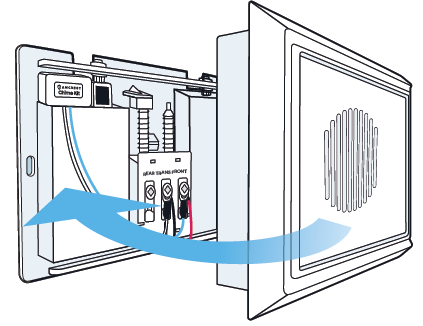
Step 6: Replace the chime cover. Secure the Amcrest chime kit using the included adhesive. If you
are using a mechanical chime, ensure any excess wiring is clear of all moving parts.
After the chime kit has been installed you can now begin physically installing the doorbell. For more information on how to physically install the doorbell, click here
Comments
Please sign in to leave a comment.