How To Use IVS Features (AI DVR)
IVS stands for intelligent video system analytics and is the basis for all the AI rules associated with your device. The AI menu allows the user to customize and set IVS rules which allow the device to produce general behavior analytics and reporting directly from the web user interface.
IVS rules on the DVR are controlled either by camera or by the DVR. The DVR currently has 2 built-in IVS features available (Tripwire and Intrusion) whereas some Amcrest AI cameras may have additional IVS features. For more information on how to setup IVS and heat map, please refer to the information provided below.
Note: Please make sure to completely disable any face detection, face recognition, people counting or other AI features when using IVS rules.
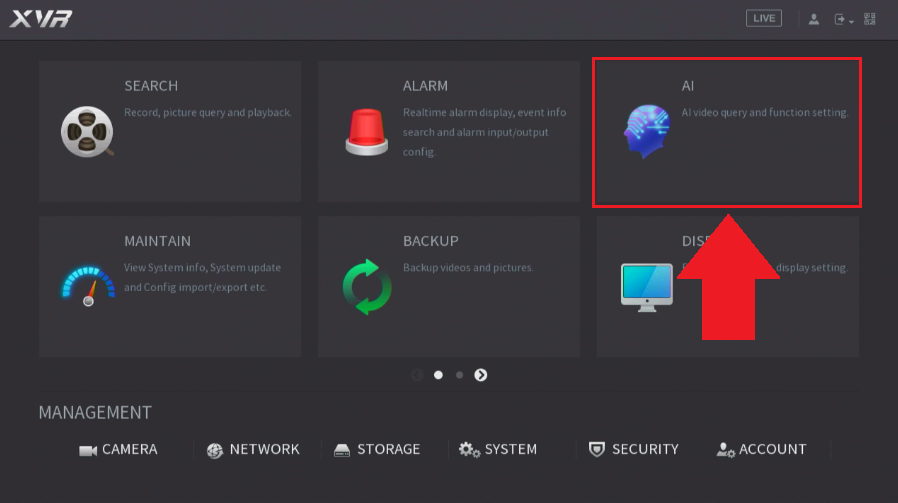
Step 1: Access the AI menu via the main menu.
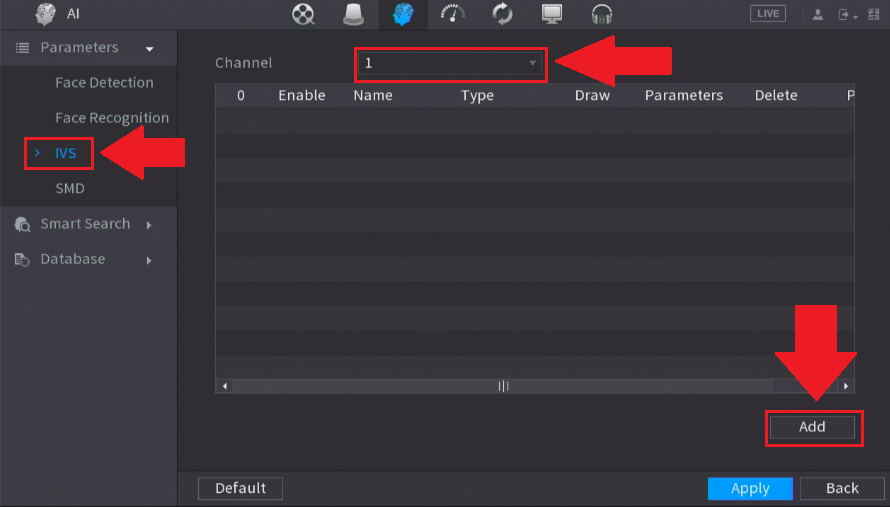
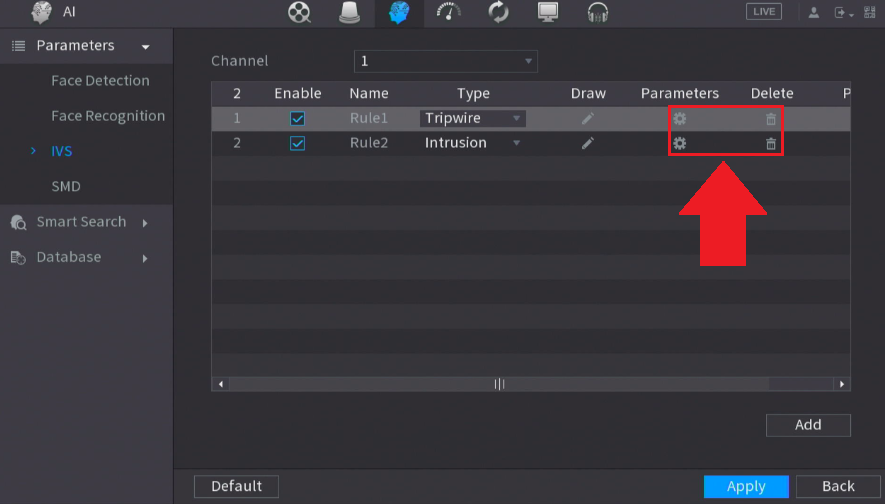
Step 2: In the Parameters section, click IVS select a channel in which the IVS rules will apply, and click the Add button to add an IVS rule.
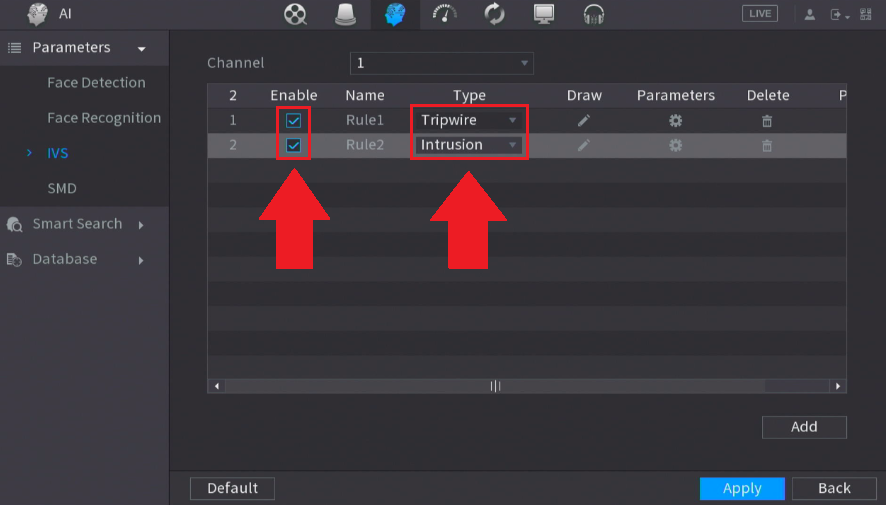
The DVR provides 2 IVS rules, tripwire, and intrusion:
Tripwire: Allows the device to trigger an event if an object, such as a human or vehicle, crosses a set tripwire line.
Intrusion: Allows the device to trigger an event if an object, such as a human or vehicle, appears or crosses a set intrusion area.
To add an additional rule, click on the Add button again and use the Type dropdown menu to select a rule.
Step 3: Click the Enable check boxes next to the rule to enable the rule.
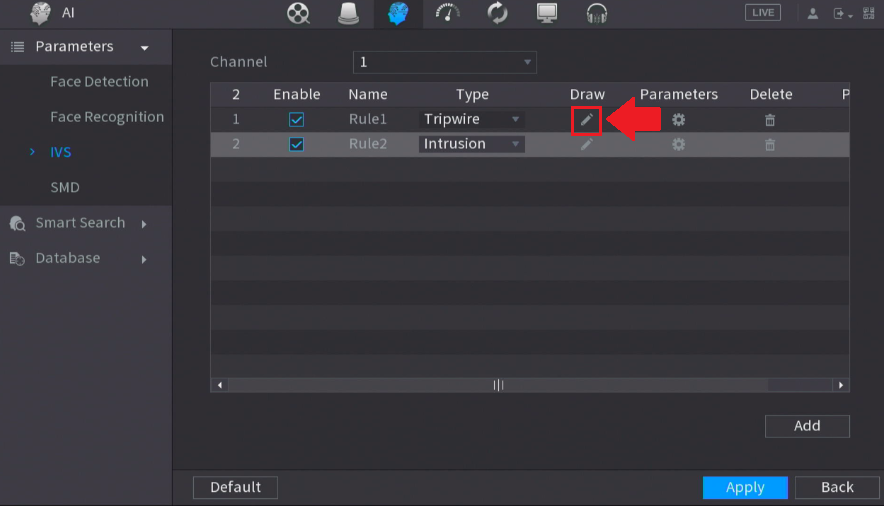
Step 4: Click Draw to begin drawing the rule on the interface.
Step 5: Use your mouse to draw an area or line on the interface. Click on the interface and use your mouse to draw an area or line, click your mouse on the interface when done, then right-click to set the area or line to the system.
Note: Once an IVS rule is triggered the line or area visible on the live view screen will flash.
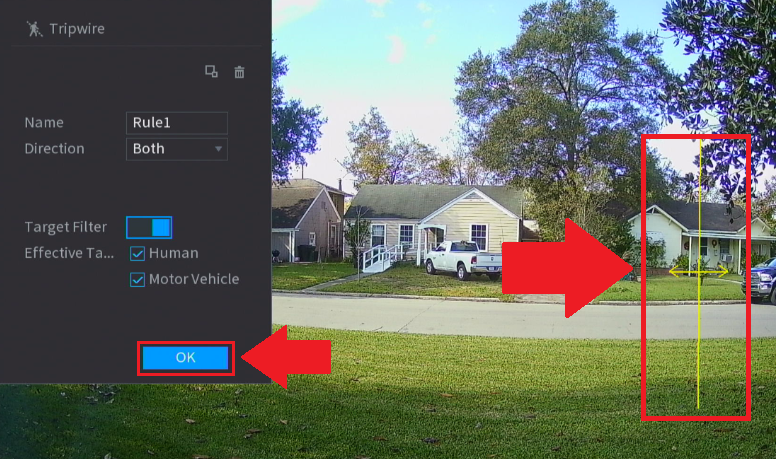
The Target Filter option is used to set a minimum or maximum detection area. It is recommended to leave this as default; however, it can be modified if needed. Use the Clear (trash can) icon to remove a drawn area or line. If you would like to add a name to the rule, enter a name in the Name box. The Direction drop-down menu allows you to choose a direction in which the rule will be triggered.
Use the target filter toggle switch to enable or disable the target filter. If Human is chosen, the rule will only be triggered if a human figure is detected. If Vehicle is chosen, the rule will only be triggered if a vehicle is detected by the system. Both effective target object filtering options can be used simultaneously if needed. Object filters can be enabled for accuracy. Click OK to return to the IVS interface.
Use the Parameter (gear) icon to apply any additional settings to an IVS rule, such as enabling email snapshots, etc. To delete an IVS rule, click on the delete (trash can) icon.
Click Apply to save the IVS rules to your device.
How To View IVS Data
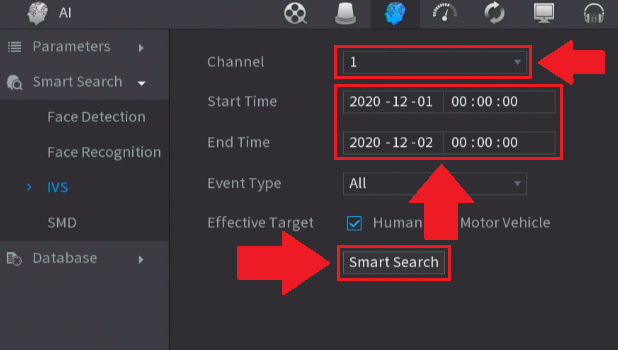
Any IVS data retained on the system can be viewed using the IVS Smart Search interface or via the playback menu if an IVS schedule is set in the system. To view IVS data using the IVS smart search interface, click on the IVS option located in the Smart Search menu, select a channel, and enter a start and end time in which the IVS events occurred. Click Smart Search.
A layout of all IVS events will be displayed. To view the event, select the event from the interface, and click the play button.

Comments
Please sign in to leave a comment.