Video metadata is used to detect and retain specific object types such as people, non-motor vehicles, and motor vehicles. Video metadata is typically used in conjunction with AI Live snapshots and other various metadata options such as structured statistic overlays and video metadata reports. For more information on how to set up video metadata options on your device, please refer to the information provided below.
Video Metadata Setup
Video metadata can be set up using either a global or manual preset. Please note, for best results, it is highly recommended to enable a manual preset and smart plan. For more information on how to set up a smart plan, click here.
Once a video metadata smart plan has been enabled, please follow the steps below to finish setting up video metadata on your device.
Step 1: Navigate to Event>>Video Metadata. Click the (+) icon in the video metadata menu to begin adding video metadata rules.
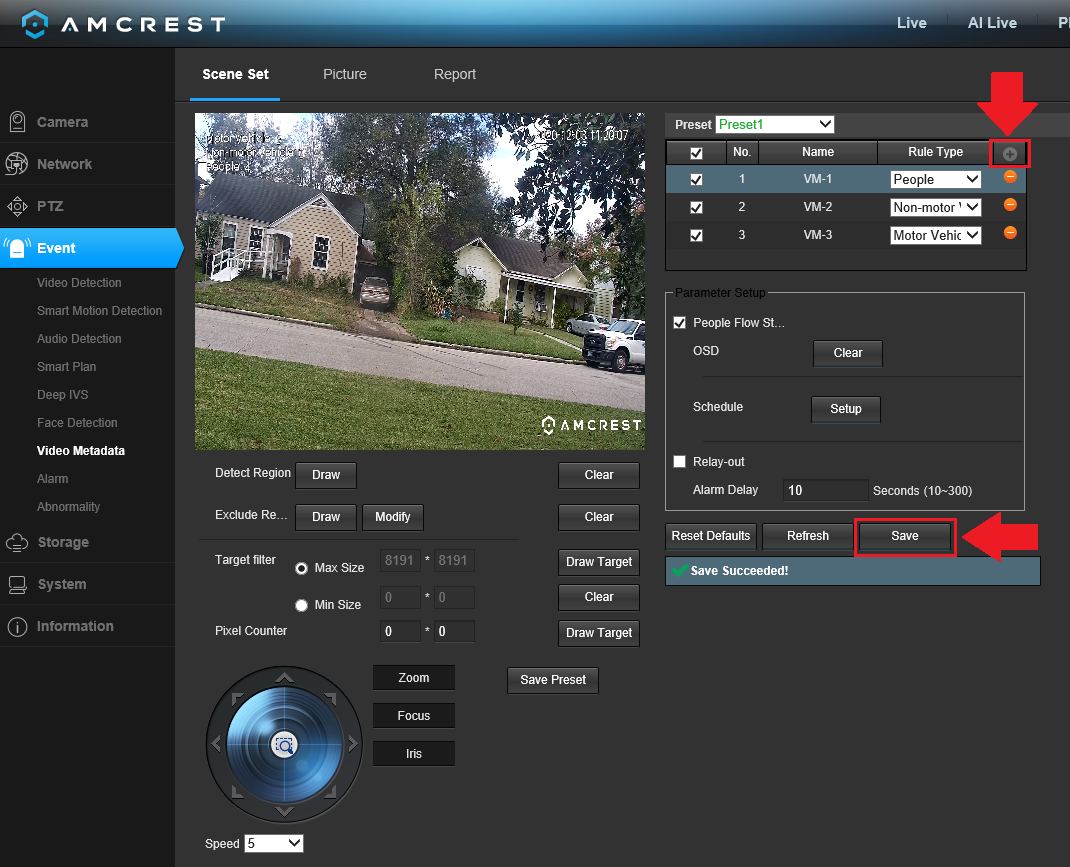
Please note, a max of 3 video metadata rules can be applied. Click the (+) button to add additional rule types if needed. Use the rule type dropdown menu to select a specific video metadata rule type that will be applied.
Below is a description of the options in the metadata menu.
Preset: Use this dropdown menu to select a preset. Please note the preset and smart plan must be enabled to add any video metadata rule types.
No.: Provides the order in which the video metadata rules will be displayed in the menu.
Name: This allows the user to customize a name for their rule. Double click the name in the Name column to modify.
Rule Type: Use the rule type dropdown menu to select a video metadata rule.
(+): Used to add a video metadata preset into the interface.
People Flow Statistics: Enable this checkbox to allow flow statistics to be displayed in the OSD overlay.
Schedule: This allows the user to set a schedule in which video metadata will be triggered.
Relay Out: This checkbox allows the user to enable the camera to trigger a connected alarm (connected to the alarm port on the back of the camera) when a motion detection alarm is triggered.
Alarm Delay: This field specifies in seconds how long the delay between alarm activation and Relay alarm activation should be.
Detect Region: This option is used to set a face detection area. The area will be full screen by default.
Clear: This option is used to clear any face detection areas currently set.
Exclude Region: This option is used to set an area in which the face detection rule will not apply.
Clear: This option is used to clear any excluded face detection areas.
Target Filter: This option allows the user to set a maximum and minimum size of the target area. By default, this option will be set to the max resolution, however, it can be manually adjusted.
Draw Target: This allows the user to set a target area on the live monitor screen.
Clear: Clears the modified target area to draw the target area on the live monitoring screen.
Pixel Counter: Used to measure and set the number of pixels in the target area on the live monitoring screen.
To reset to default settings, click the Reset Defaults button. To refresh the page, click the Refresh button. To save the settings, click the Save button.
Using the Video Metadata Picture Menu
The Picture tab allows the user to customize snapshot descriptions for different video metadata types.
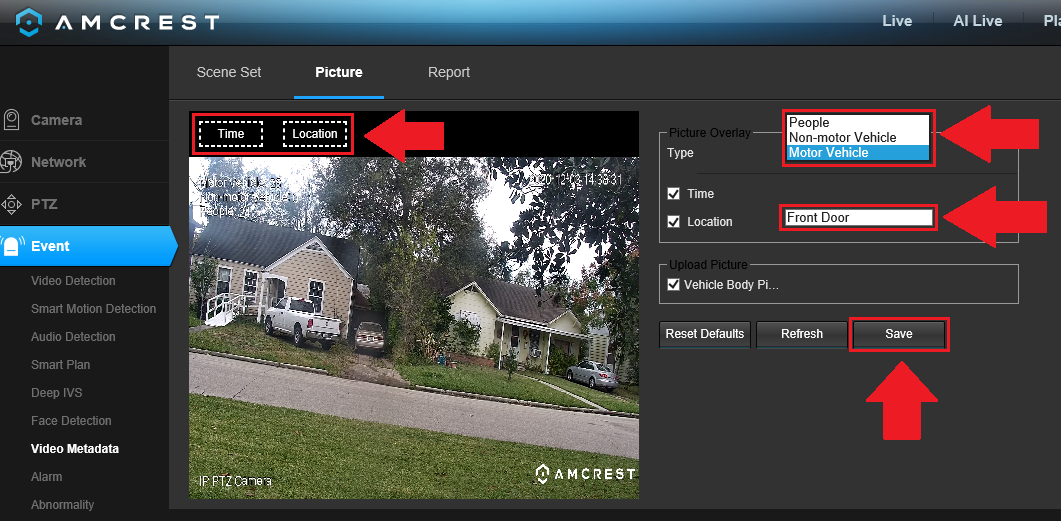
Below is description of the features in this menu:
Time/Location: Click and use your mouse to select which order the time or location will be displayed in the snapshot description.
Type: Use this dropdown menu to select a video metadata type that will be
Time: Enable the date and time in the snapshot description.
Location: Customize a location that will be displayed in the snapshot description.
Vehicle Body Picture: Enable this checkbox to allow a vehicle body snapshot to be uploaded when detected.
To reset to default settings, click the Reset Defaults button. To refresh the page, click the Refresh button. To save the settings, click the Save button.
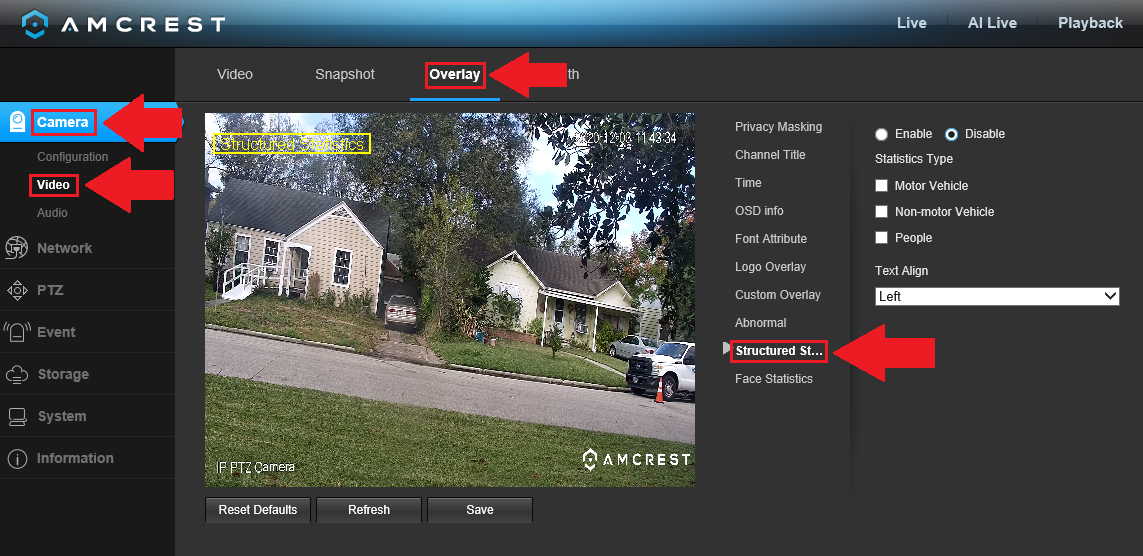
Enabling a Video Metadata Overlay
A video metadata overlay can be enabled which will allow you to view the number of objects detected by the camera. It is highly recommended to enable a video metadata overlay to improve the overall efficiency of the feature.
Step 1: After the video metadata rule types have been saved, navigate to Camera>>Video>>Overlay and select the Structured Statistics option.
Step 2: Click Enable and select which structured statistics types will be viewed in the overlay. Click Save.
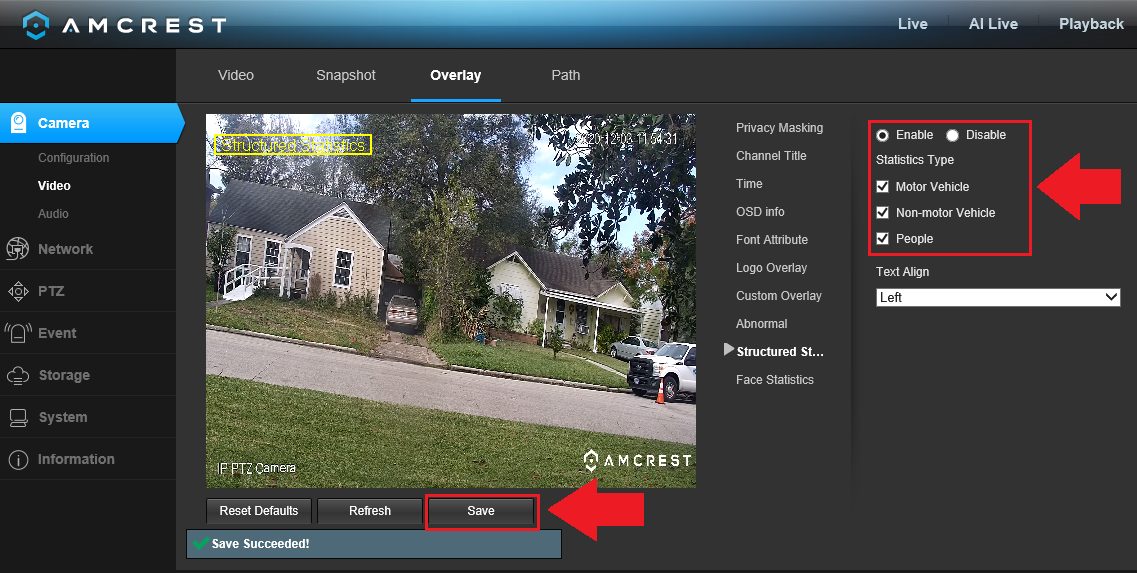
Note: On the interface, you will notice a yellow box, this is used to move the overlay around on the interface if needed. Be sure to click Save if adjusting the overlay.
Viewing Video Metadata in the AI Live Menu
The AI Live tab allows the user to access video metadata such as detected people, faces, motor vehicles, and non-motor vehicles such as bikes, mopeds, etc. in real-time. Please note, a video metadata preset must be set for this feature to function. A snapshot of the events will be displayed in accordance with the rule type detected.

Note: The snapshots in this menu will disappear after the interface has been refreshed.
Viewing a Video Metadata Report
The camera allows the user to generate a report of the video metadata detected by the device via hourly, daily, monthly, or yearly reporting. For more information on how to view a video metadata report, please refer to the information provided below.
Step 1: Navigate to Setup>>Event>>Video Metadata and click on the Report tab.
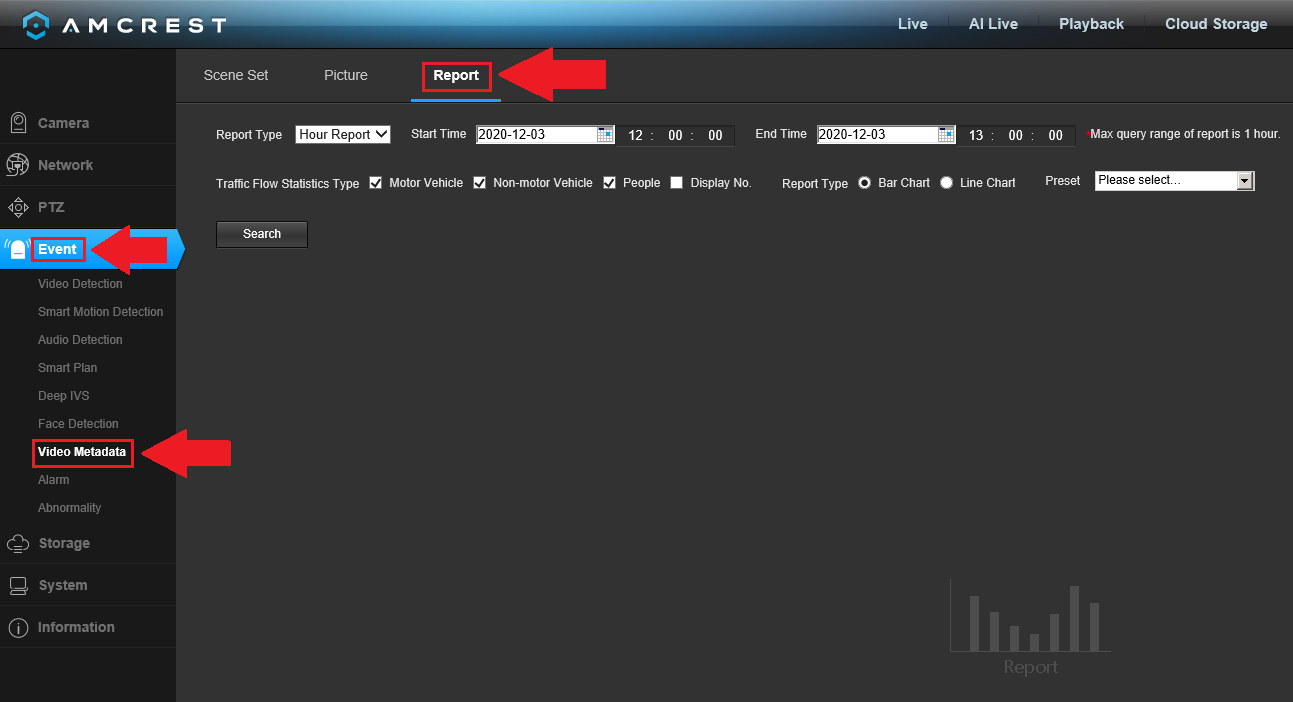
Step 2: Click on the Report Type dropdown menu and choose between an hourly, daily, monthly, or yearly report. Enter a start and end time for the report and choose a preset from the Preset dropdown menu. Click Search to generate a report.
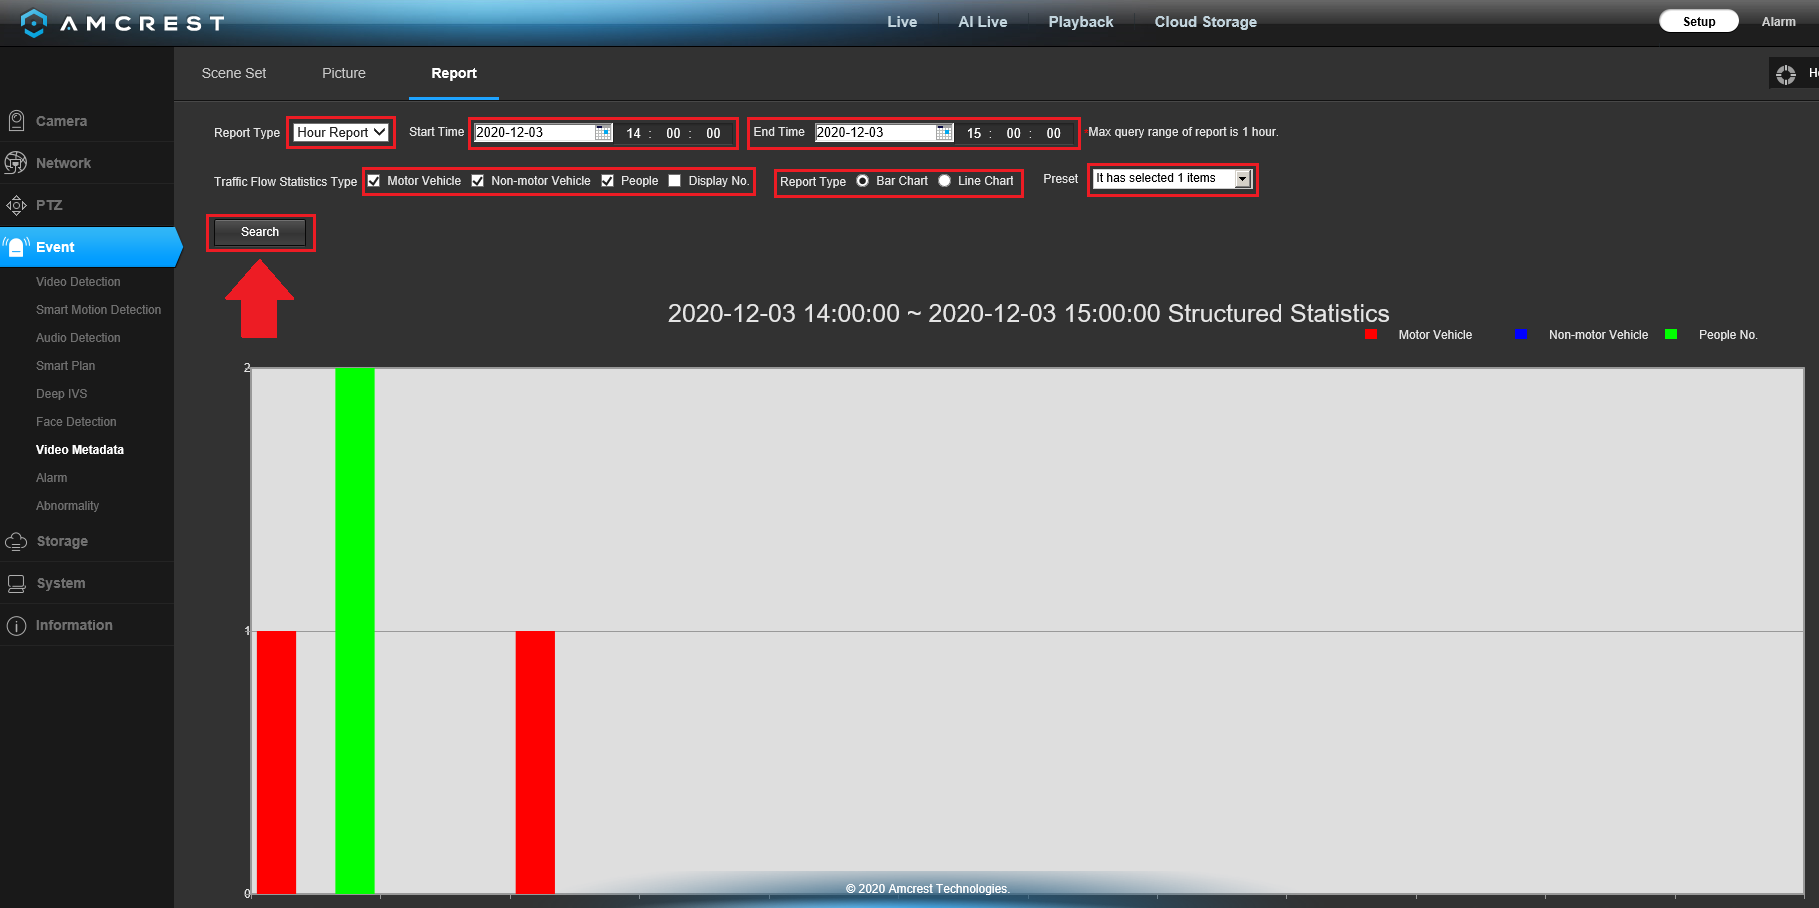
The data will be represented with color-coded bars or lines depending on which report type was chosen. The number of events will be represented on the left side whereas the time increments will be represented at the bottom of the graph.
Comments
Please sign in to leave a comment.