How To Setup Email Alerts On an AI DVR
If you would like alerts such as motion detection events/notifications, or snapshots sent to your email as an alert, please refer to the information provided below.
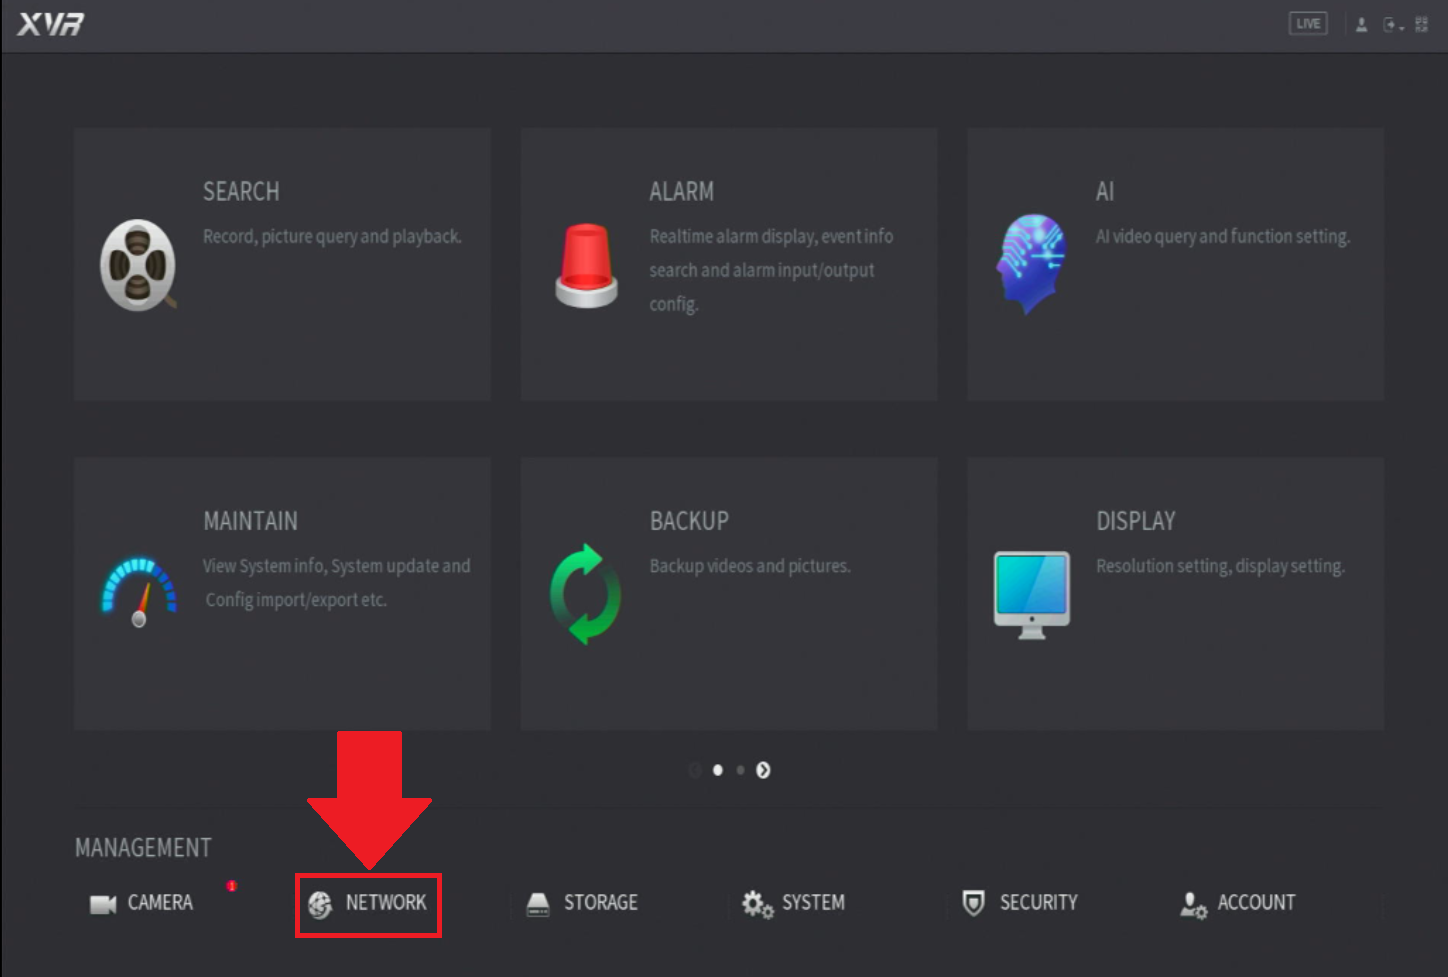
Step 1: Log into your device and click on the Network tab located in the Management menu.
Step 2: In the Network menu, click on the Email tab.
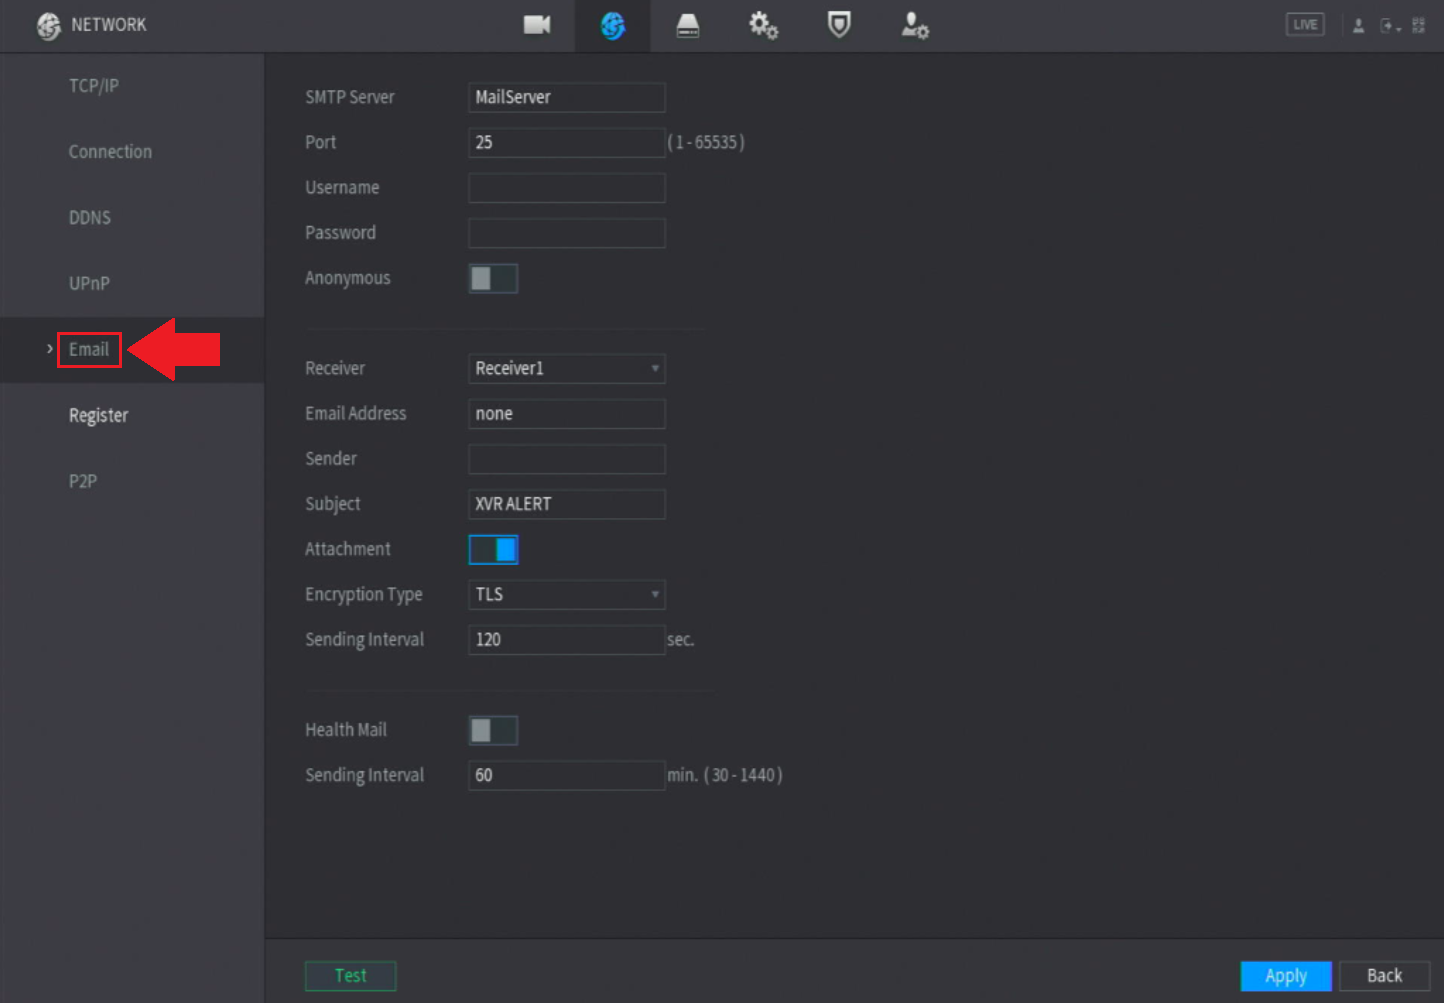
Step 3: Enter the SMTP information for the email address you will be using. I will provide an example for further assistance.
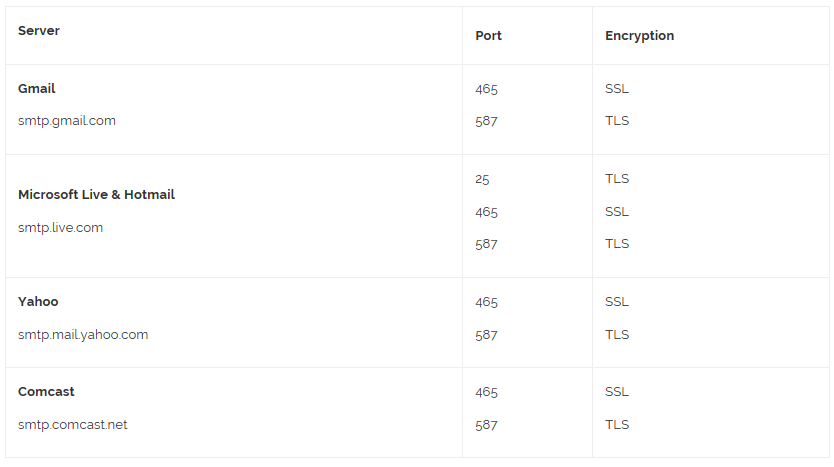
In this example, we will be setting up email alerts for a Gmail account. If you use another service or would like more information on different SMTPs supported by this system here is a list of popular email servers, ports, and encryptions:
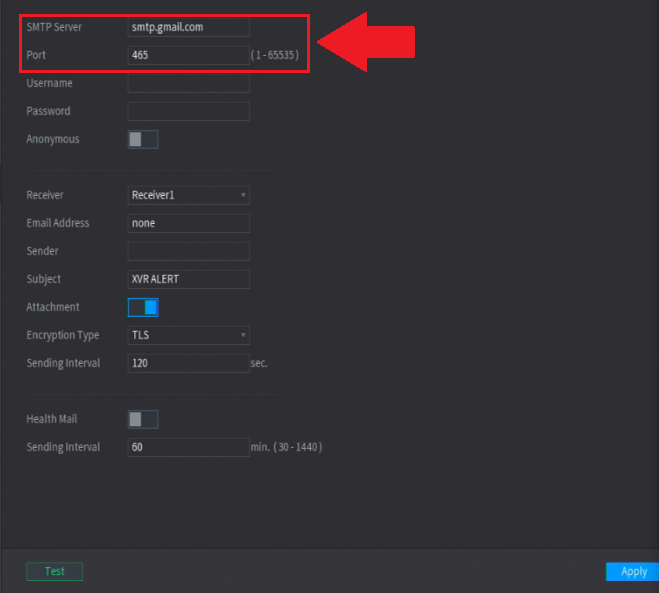
Since we are using a Gmail account in this example we will enter, "smtp.gmail.com" into the SMTP Server field. We will also need to enter the port number. It is recommended to use SSL as a protocol for this process. Since we are using SSL we will enter 465 into the Port field.
After this information is entered, you will need to enter your username and password information. The username will be the email address of the person sending the email and the email password for that account.
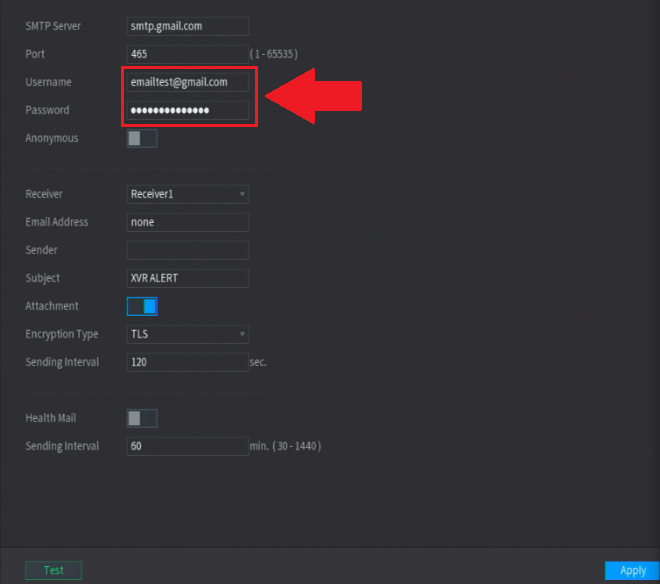
Note: The anonymity toggle switch can be enabled if you would like the email address to be anonymous.
The system will allow you to add up to 3 receivers for email alerts. In this example we will just be sending the alert to 1 receiver, however, if you have multiple email addresses you would like to send the alerts to, use the Mail Receiver drop-down menu to add multiple email addresses.
To add a receiver, enter the email address for the receiver in the Email Address field. Next, enter the username email address again into the Sender field.
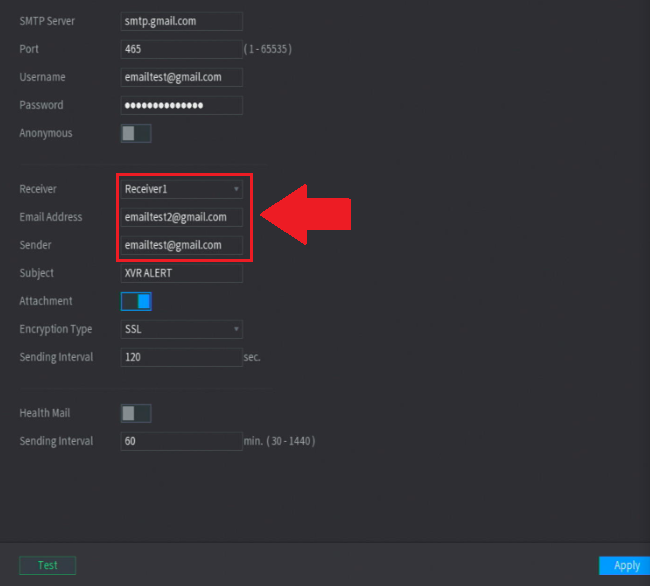
You can also edit the title of the email in the Title field. If you are sending snapshots to your email you will need to enable the Attachment toggle switch to the on position.
Next, in the Authentication drop-down menu, since in this example we are using SSL as our authentication protocol, select SSL. For more details on the other settings listed in this menu, please refer to the table below.
|
Interval (Sec.) |
This is the interval that the system sends an email for the same type of alarm event, which means, the system does not send an email upon any alarm event. This setting helps to avoid the large amount of emails caused by frequent alarm events. The value ranges from 0 to 3600. 0 means that there is no interval. |
|
Health Enable |
Enable the health test function. The system can send a test email to check the connection. |
|
Interval (Min.) |
This is the interval that the system sends a health test email. The value ranges from 30 to 1440. 0 means that there is no interval. |
|
Test |
Click Test to test the email sending function. If the configuration is correct, the receiver’s email account will receive the email.
Note: Before testing, click Apply to save the settings. |
Note: Before testing your email alerts, make sure that you have disabled 2-step verification. For more information refer to the information provided below.
2-Step Verification FAQ Gmail
After you log in to your Gmail and you can view your inbox open a new tab and go to:
https://myaccount.google.com/security
Scroll down and find 2-Step Verification under Password & sign-in method, click the pencil icon and disable it. To apply the settings, click Apply. To exit this menu, click on the Back button.
Comments
Please sign in to leave a comment.