The ASH47-W camera has 2 methods of setup, you can set the camera up using Wi-Fi (which is recommended) or directly using an Ethernet connection. Please note, Both setup methods cannot be used simultaneously. There is not an Ethernet WIFI setup option available for Amcrest Smart Home devices. This article will detail how to set up the camera using the Ethernet Only method.
Before setting your camera up using the Ethernet Only method, ensure an Ethernet cable is plugged into the back of the camera and the camera is connected to your network. The camera is not POE and must be powered using the included power cable/adapter. Please ensure the camera and your mobile device are on the same network during setup.
Please note, before setting up the camera on any other platform, such as the Amcrest View Pro app or an NVR, the device must be connected to the Amcrest Smart Home app first. For more information on how to set up your camera on the Amcrest Smart Home app, please refer to the information provided below.
For more information on how to set up your camera via the Ethernet only setup method, please refer to the information provided below.
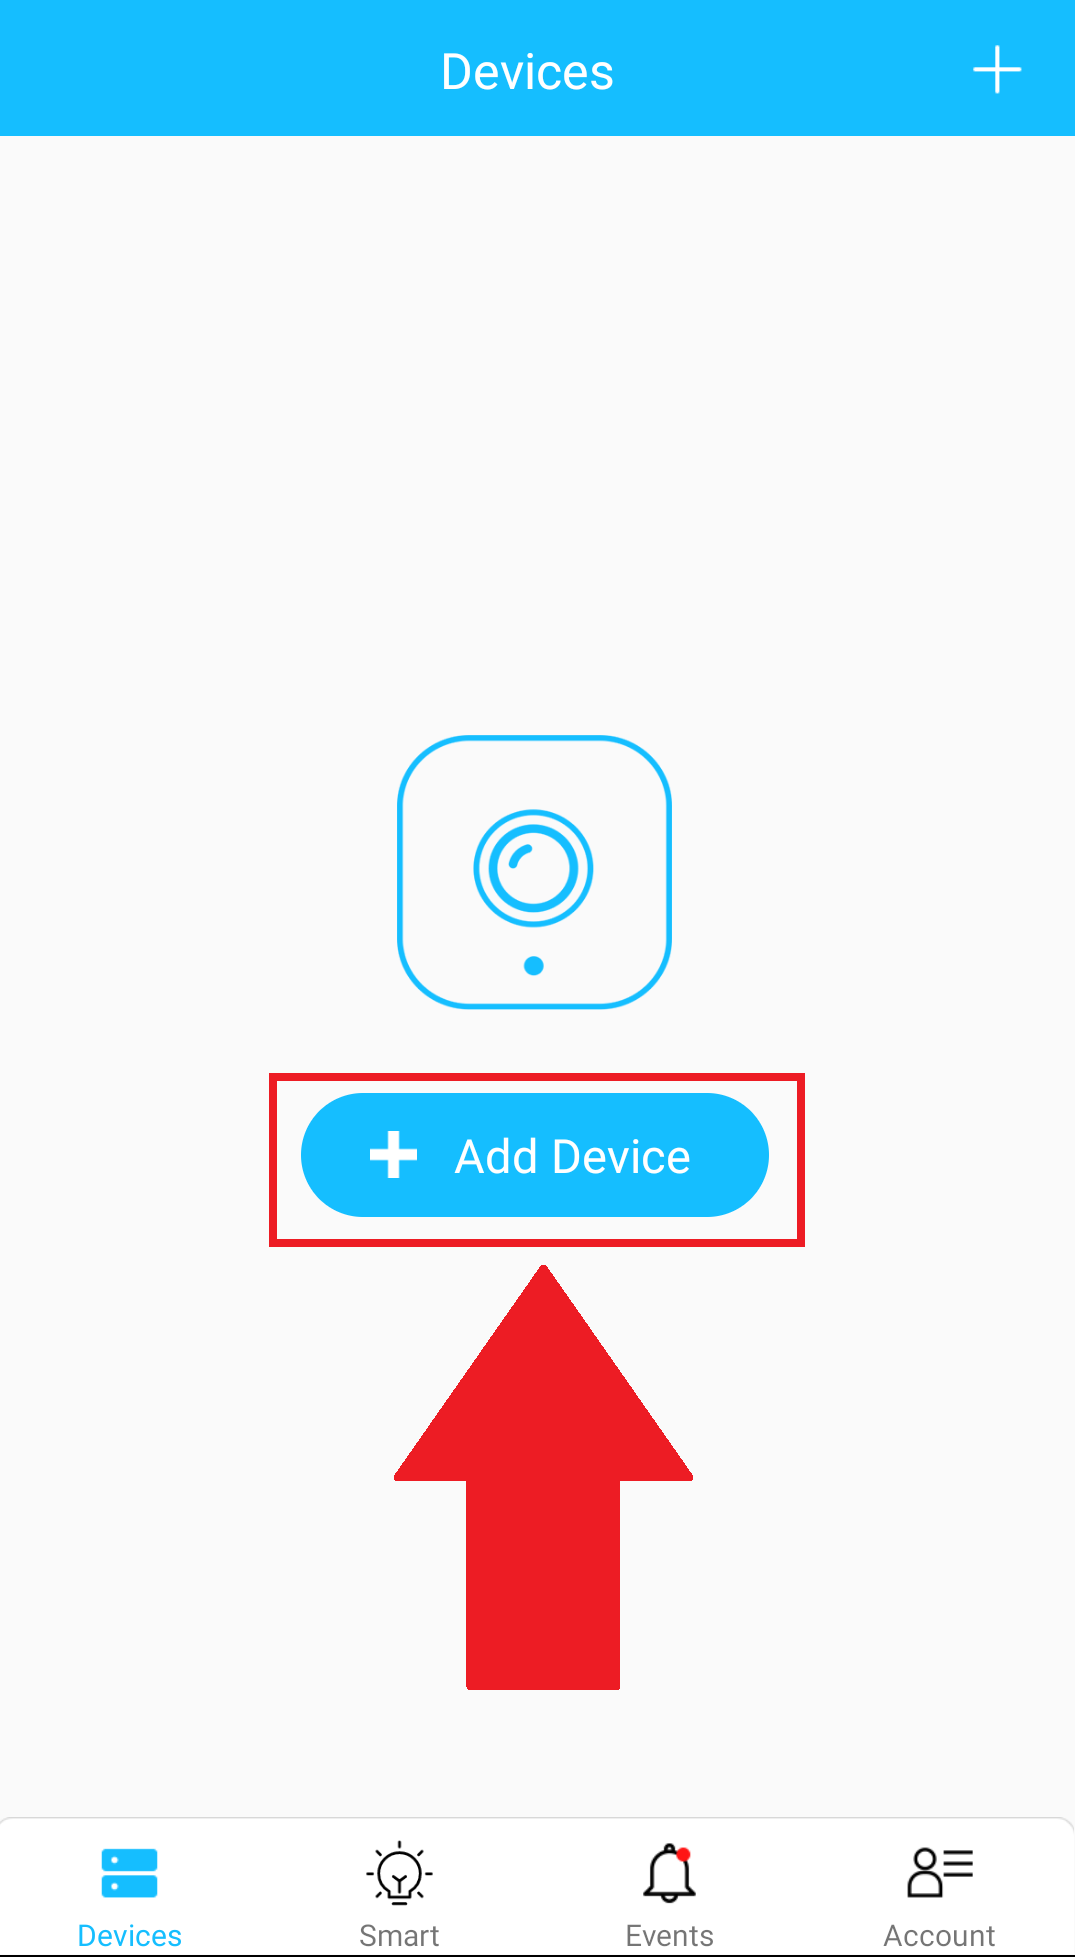
Step 1: Open the Amcrest Smart Home app and tap on “Register” to register an account (if you have not already done so). After registering an account, log into the app and tap on “Add Device”.
Step 2: Scan the QR code located at the top of your camera. If you are unable to scan the QR code you can manually enter the serial number by tapping “Manually enter SN”.
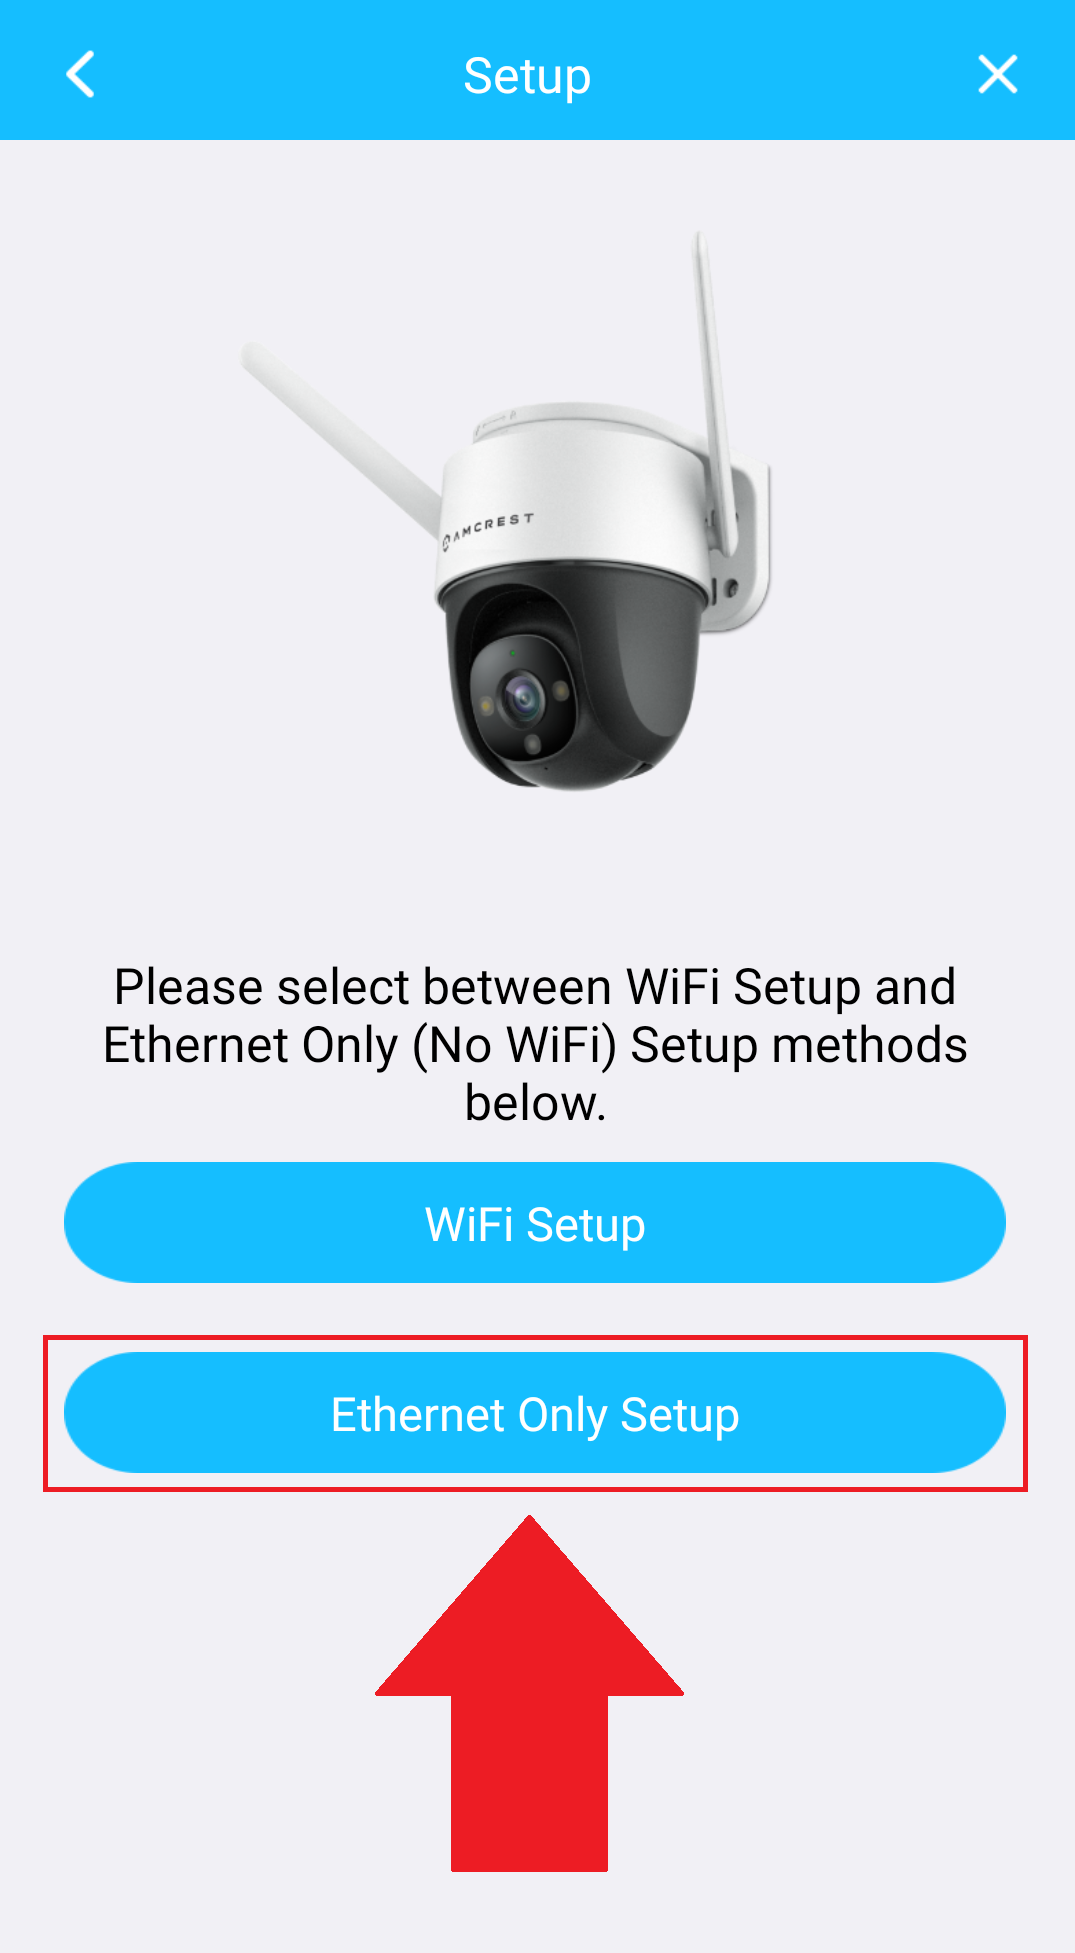
Step 3: Tap on "Ethernet Only Setup"
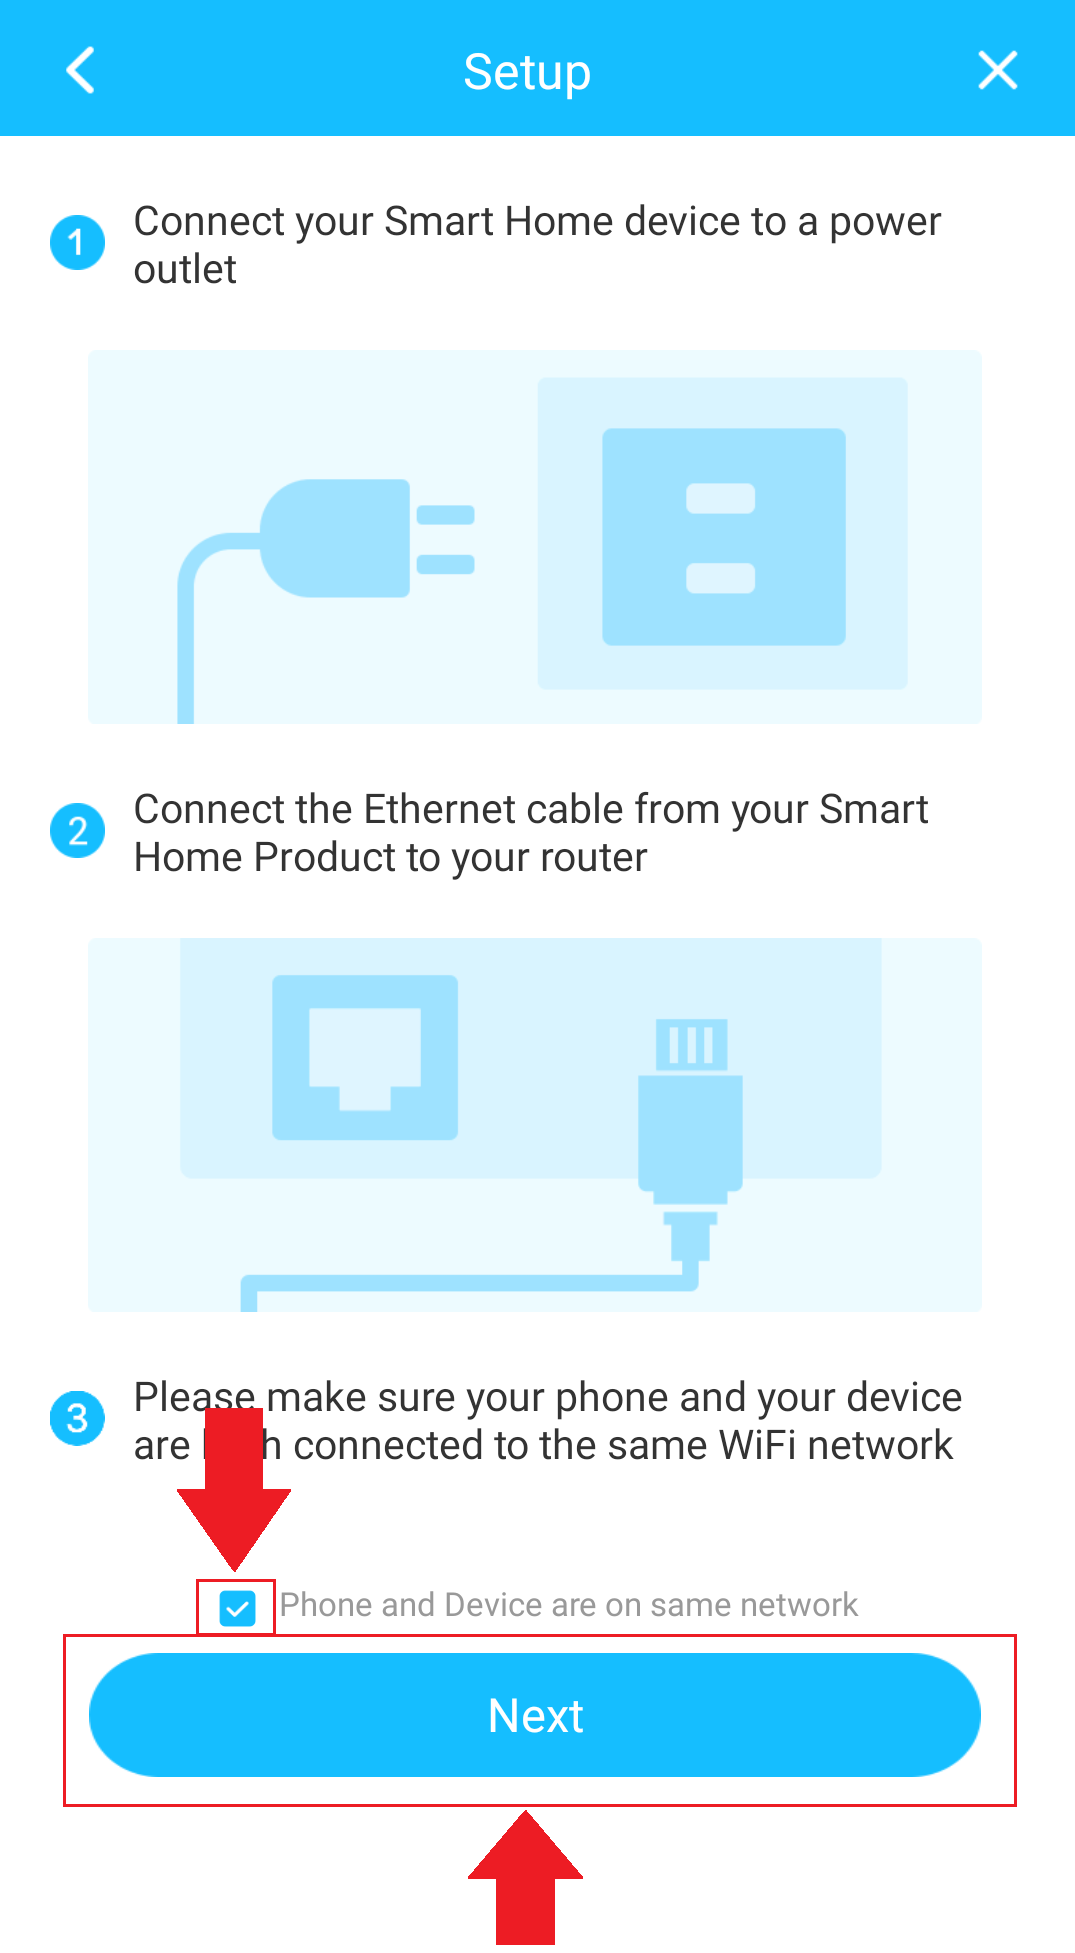
Step 4: Ensure your mobile device and phone are on the same network during setup. Tap on the “Phone and Device are on same network” checkbox once confirmed. Tap "Next" to continue.
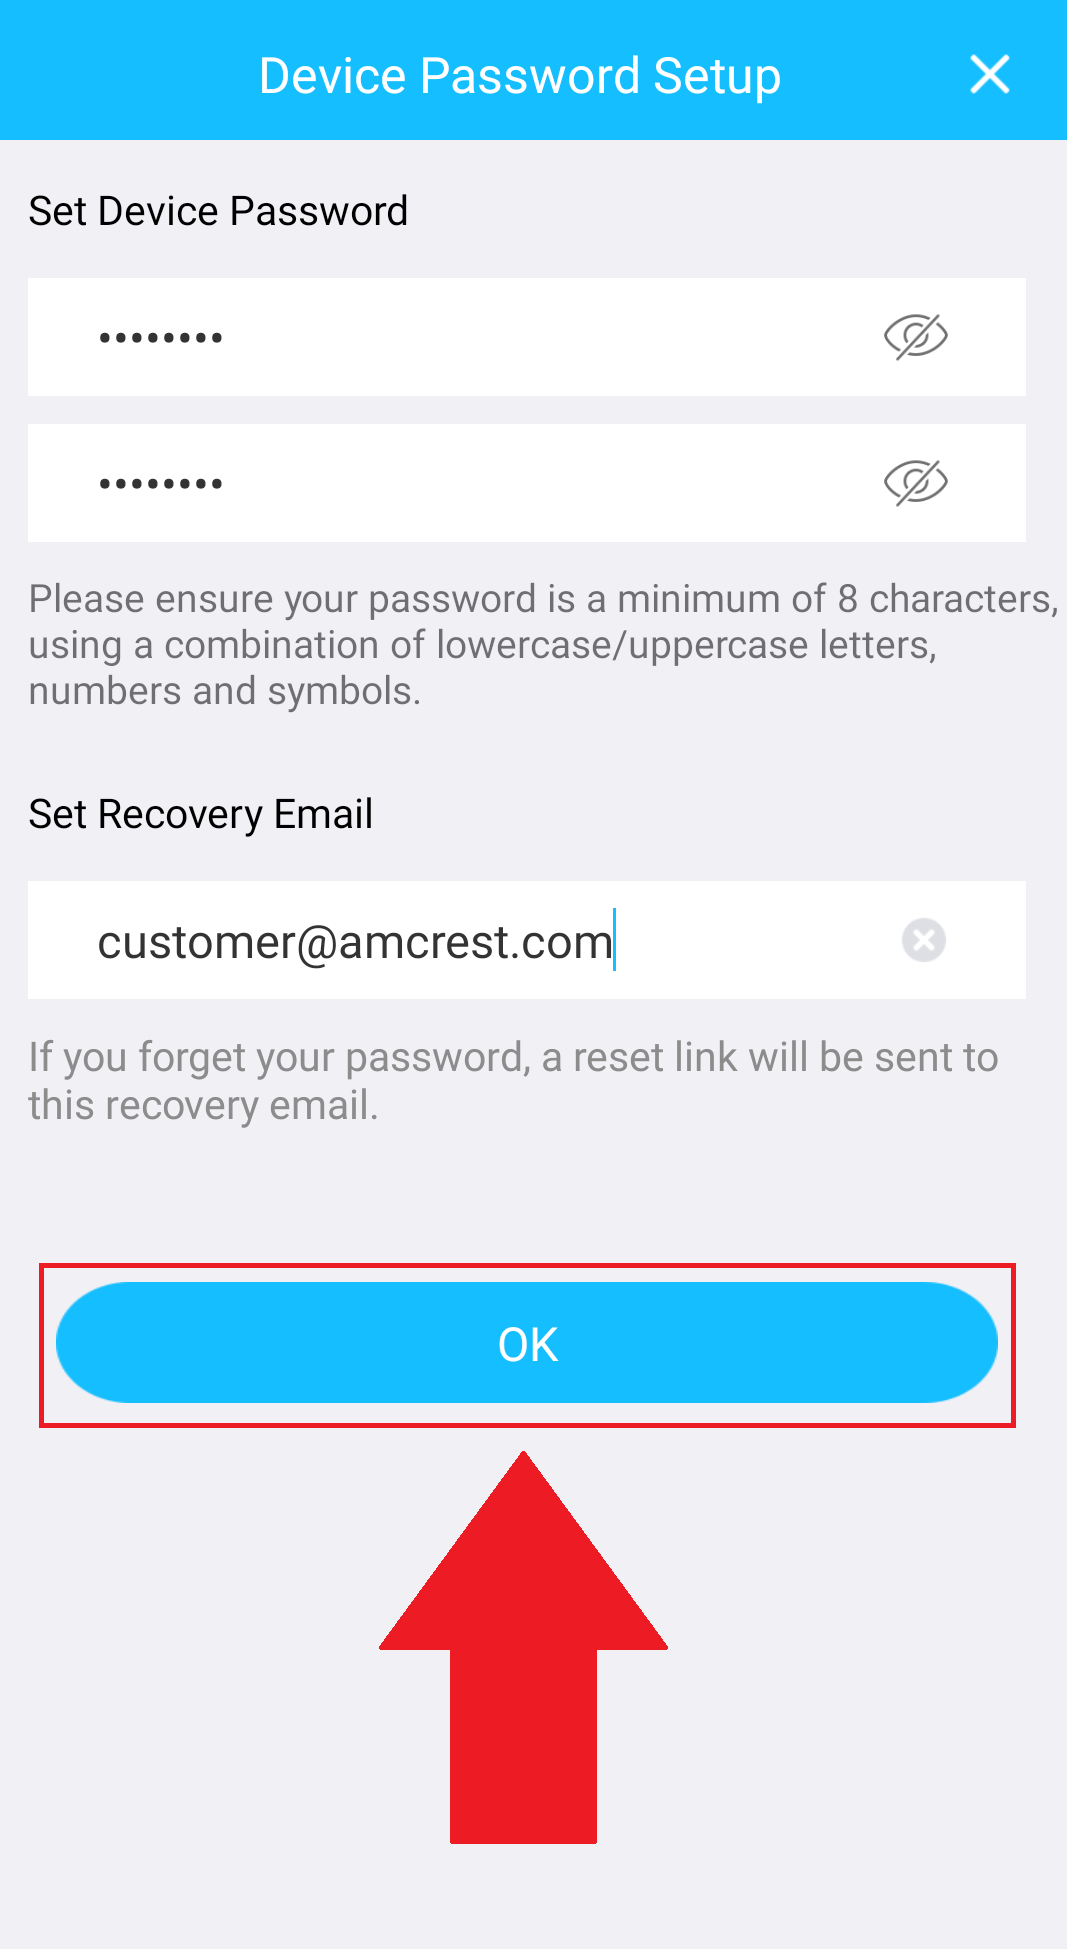
Step 5: A password will then need to be set for the camera. This will be the password for your camera. Enter a password with a minimum of 8 characters using a combination of upper/lowercase letters and numbers and confirm. A recovery email can also be entered in case you forget the password for your device. Tap "OK" to continue.
Note: A prompt will be displayed indicating that WIFI on the camera is not enabled yet, this is because you are setting the camera up using an Ethernet cable. Tap OK to continue.
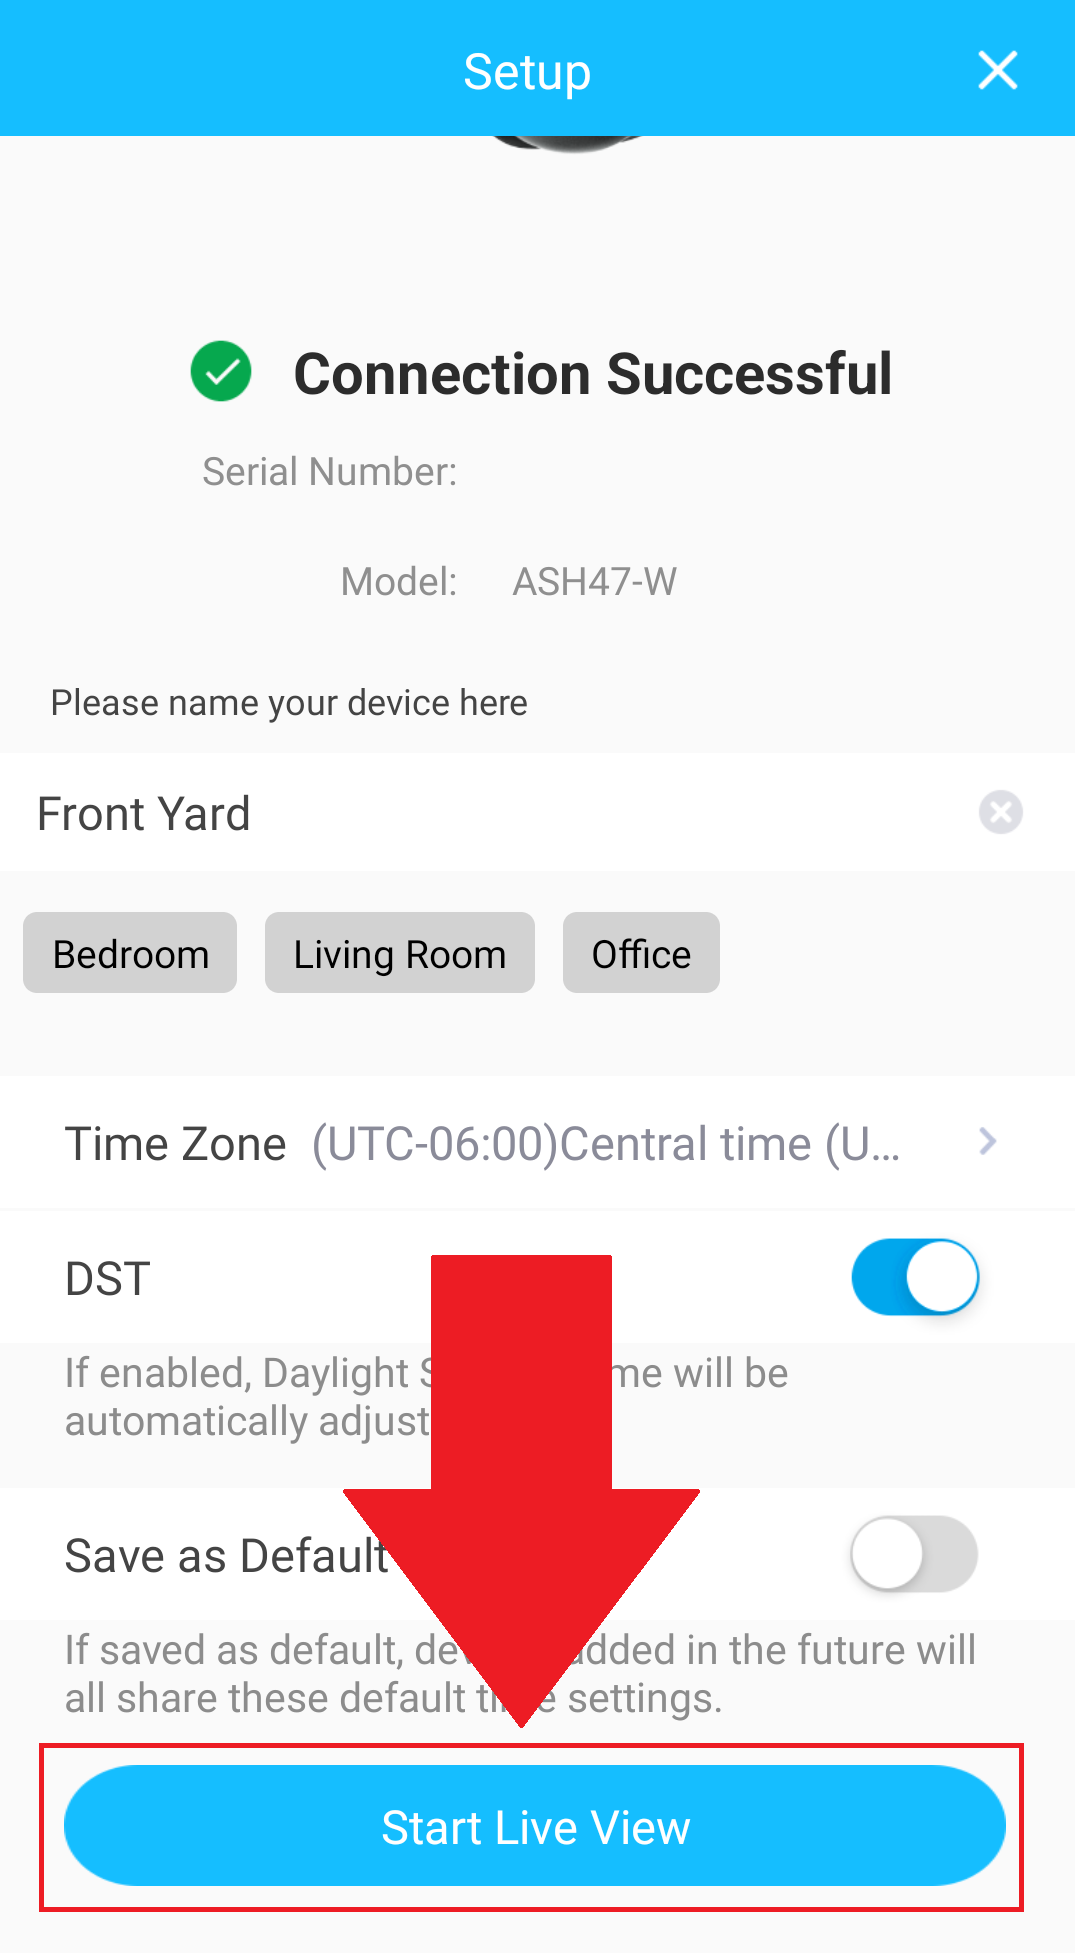
Step 6: Enter a name for the device and verify the time zone information. Tap Start Live View to view your camera.
Comments
Please sign in to leave a comment.