How To Adjust Audio Settings.
If your camera has audio capabilities you can adjust these settings directly. Audio settings can be adjusted by accessing your device on a laptop or PC via the device's web user interface (web UI). For more information on how to access the web UI for your device, click here.
Step 1: Log into the web UI for your device on a laptop or PC.
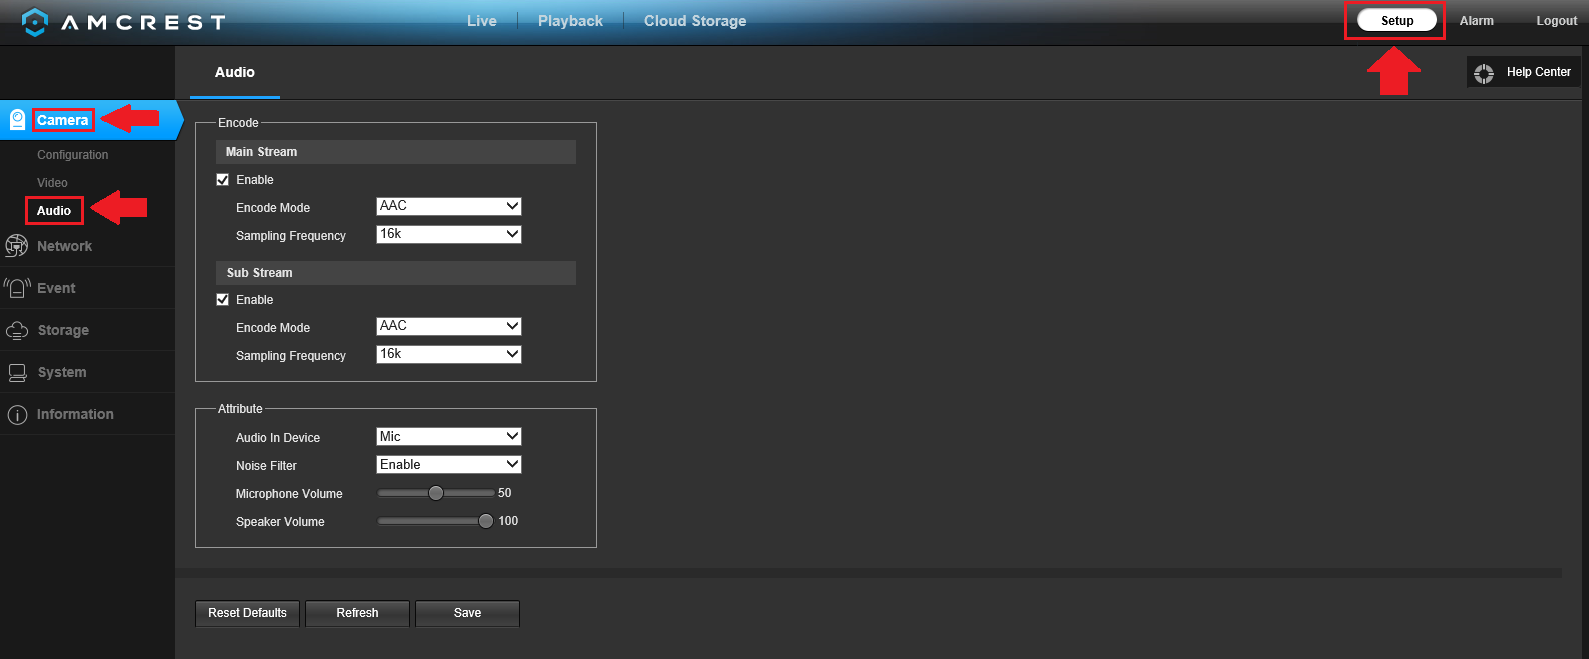
Step 2: In the web UI, navigate to Setup>>Camera>>Audio.
Note: If your camera does not have an Audio option, then the device is not compatible with any audio sources.
Step 3: This menu allows the user to modify audio settings for the camera. Below is an explanation for each of the fields listed in the Audio menu:
- Enable: This checkbox allows the user to enable audio recording.
- Encode Mode: This dropdown box allows the user to select what audio format the audio should be recording in.
- Sampling Frequency: This dropdown box allows the user to select a sampling frequency for the audio. The options listed in this menu are 8k and 16k. 16k audio sampling allows for higher sound quality.
- Audio in Device: This field allows the user to select what source to get audio from. The default will always be the camera's built-in mic. Alternatively, the line in mic can be selected.
- Noise Filter: This dropdown box allows the user to enable or disable the audio noise filter function. This function helps to provide a cleaner audio quality when enabled.
- Microphone Volume: This slider allows the user to adjust the microphone volume. The value ranges form 0 to 100. The default value is 50.
Step 4: To save the applied audio settings to your device, click on the Save option.
Comments
Please sign in to leave a comment.