How To Set a Device to a Static IP
Setting your device with a static IP address will ensure the device has a more stable connection with your network as well as provide a more efficient means of accessing your device remotely. To a camera to a static IP in the NVR, please refer to the information provided below.
Note: When accessing your device via its web UI on a laptop or PC, please only use either Internet Explorer or Safari. Google Chrome is not a viable option for DVR/NVR access. For more information on how to establish a static IP for local access setup via a laptop or PC, please click here.
Step 1: Make sure your device is connected to a monitor (VGA or HDMI) and attach an Ethernet cable to the Ethernet port on the back of your device. Once it is connected, power on the device with a compatible power adapter and allow the device to initialize.
Note: Please also attach a USB mouse to the unit to navigate through the screens.
Step 2: Once your device has initialized, log in using the login credentials for your device, (username and password). If this is your first time logging into your device the username and password will be admin.
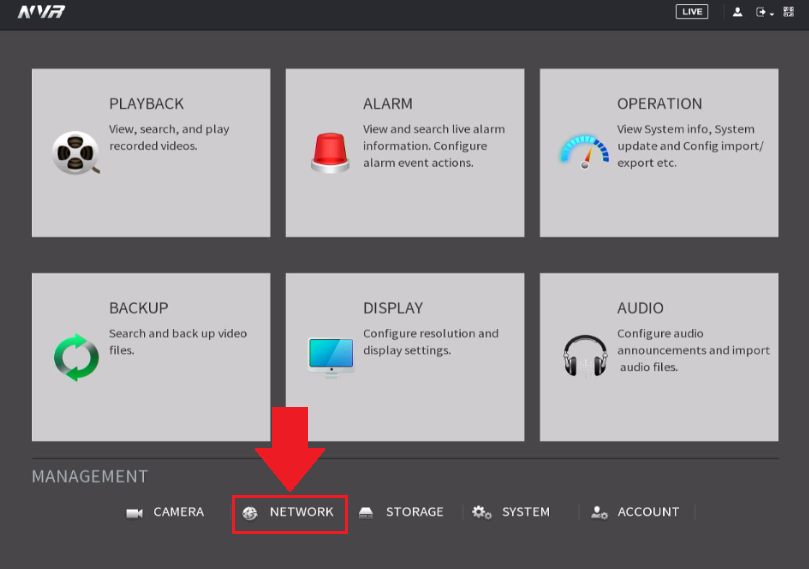
Step 3: Navigate to the main menu, and in the Management section, click on Network.
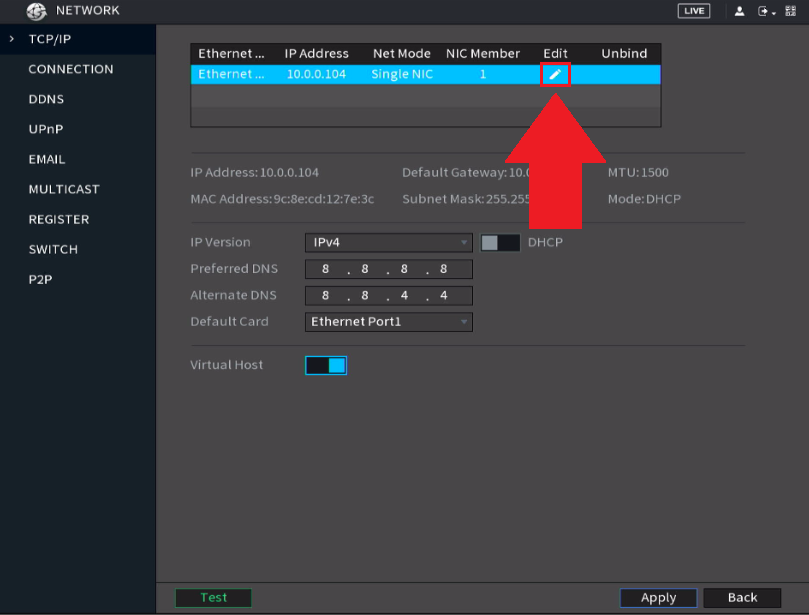
Step 4: In the Network menu, locate the NIC card for your device and click on Edit.
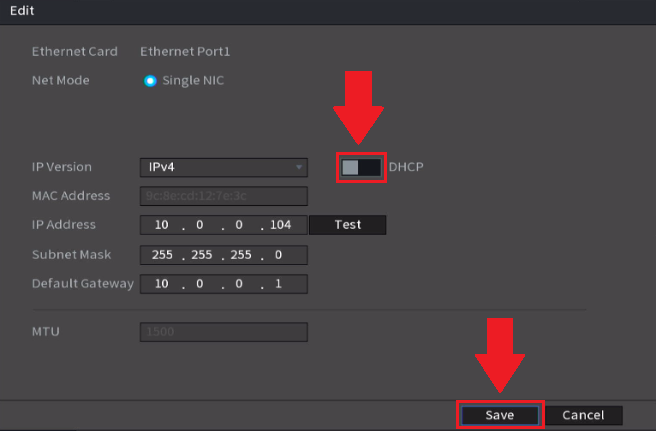
Step 5: If DHCP is enabled, click on the DHCP toggle switch to set the device to a static IP. Click Save.
Comments
Please sign in to leave a comment.