How To Change Video Stream Resolution
This article will highlight how to change the video stream resolution on various Amcrest platforms. For more information on how to perform these procedures, refer to the instructions provided below.
Amcrest Cloud App
On the Amcrest Cloud app, locate the camera you wish to modify and tap the settings (![]() ) icon. In the settings menu, tap on “Quality” and change the resolution. When the resolution has been changed successfully, tap the Save button in the upper left-hand corner to save your settings.
) icon. In the settings menu, tap on “Quality” and change the resolution. When the resolution has been changed successfully, tap the Save button in the upper left-hand corner to save your settings.
Amcrest View Pro App
On the Amcrest View app, the live steam is set by default to for efficiency purposes standard resolution (not HD). To enable HD, tap the resolution (![]() ) icon and tap on the pencil icon next to HD. After setting the resolution, tap on OK/
) icon and tap on the pencil icon next to HD. After setting the resolution, tap on OK/![]() to confirm your settings.
to confirm your settings.
Web Interface
On desktop access the default resolution is set to HD. To change the live stream resolution on the web interface, go to Setup>>Camera>>Video.
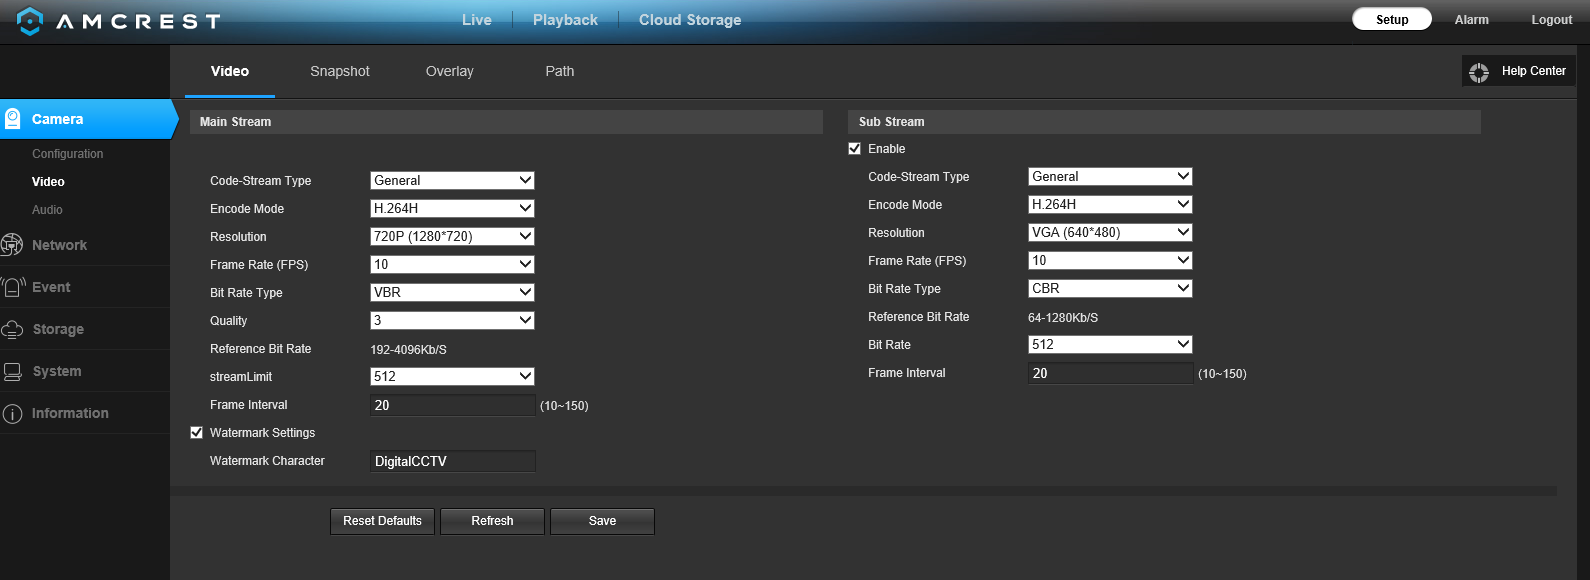
In the video menu, click on the Resolution drop down menu and select the proper resolution for your camera.
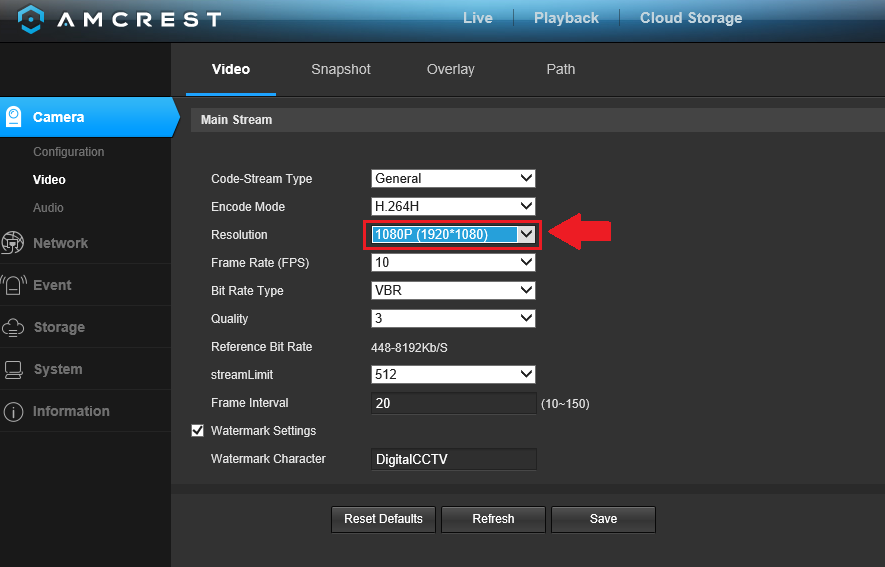
After you have set the proper resolution for your device, click on the Save icon to apply and save the settings.
Amcrest Cloud Web
To change the resolution settings on a Amcrest Cloud connected camera via the web portal, log into your account and select the camera you wish to modify. In the live view screen, click on the options tab located on the left hand side of the navigation bar. For this menu, select Edit.
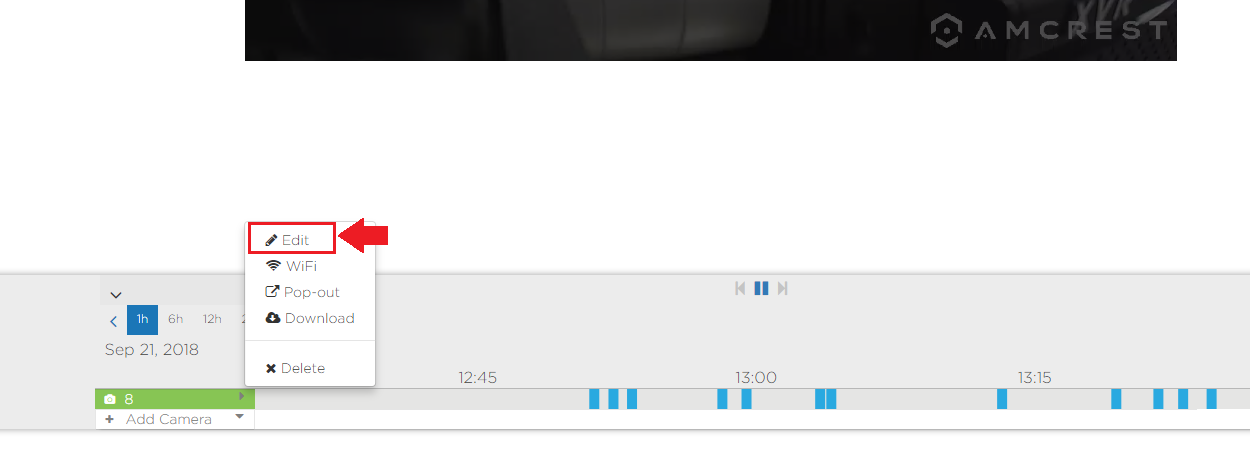
In the Edit Camera menu, from the Quality drop down menu, select the optimal resolution setting for your device.
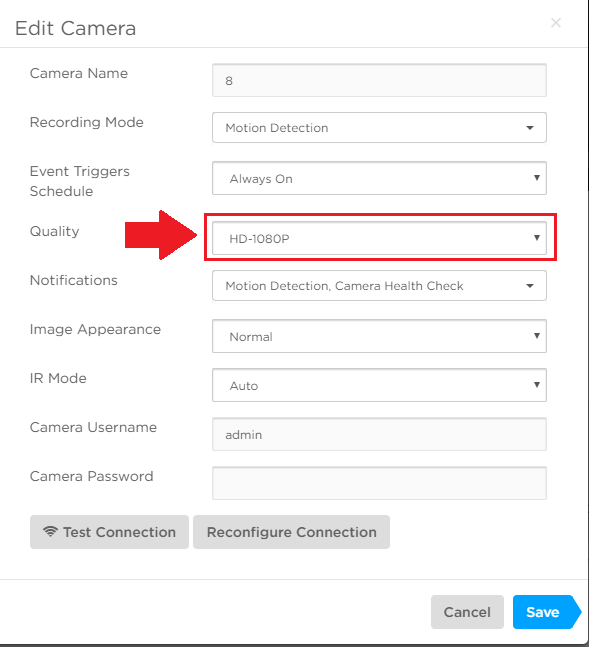
After you have set the proper resolution for your device, click on the Save icon to apply and save the settings.
Comments
Please sign in to leave a comment.