How To Use Heat Map (AI NVR)
The heat map tool is used to determine the overall crowd flow (density) over a certain amount of time in a specific area Heat map provides a color-coded layout of the density with red being the highest level to blue which is the lowest level. For more information on how to use heat map, please refer to the information provided below.
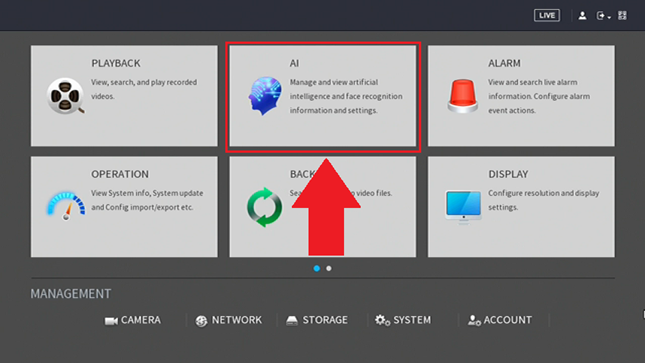
Step 1: Access the AI menu via the main menu.
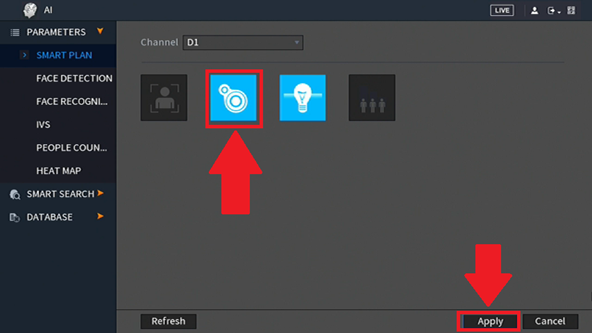
Step 2: In the Parameters section, access the Smart Plan menu and click on the Heat Map option. Both Heat Map and IVS smart plans can be active at the same time if necessary. Click on Apply (Save).
Note: If a smart plan for heat map is not available in the smart plan menu, it cannot be activated, this may be due to limitations on your AI camera, not the AI NVR.
Step 3: Enable the Heat Map toggle switch (checkbox) to turn on the feature. Click Apply (Save).
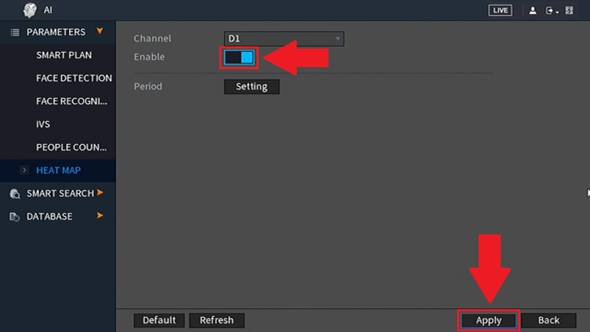
Note: A schedule can be set for this feature by clicking on the Setting button in the Period field. This will allow the feature only to function during specific times set by the user.
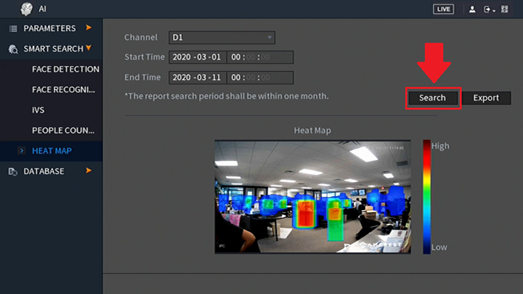
Viewing Heat Map Data
To view Heat Map data, click on the Smart Search option and click on Heat Map. Enter a start and end time into the interface and click Search. The heat map period cannot exceed one month of reporting. All heat map data will appear in the interface.
Note: To back up a heat map image, click on Export then click Save. This will save a BMP image to an external USB flash drive.
Comments
Please sign in to leave a comment.