The time task feature is a PTZ function which allows the user to set a scheduled period in which a preset will occur. This feature is available using the camera's web user interface via a web browser. A preset must be active on the camera to apply a time task action. For more information on using the time task feature, please refer to the information provided below.
Step 1: Log in to the web user interface (web UI) for your camera. For more information on how to access the web UI for your camera click here.
Step 2: Navigate to Setup>>PTZ>>Time Task and click Enable.
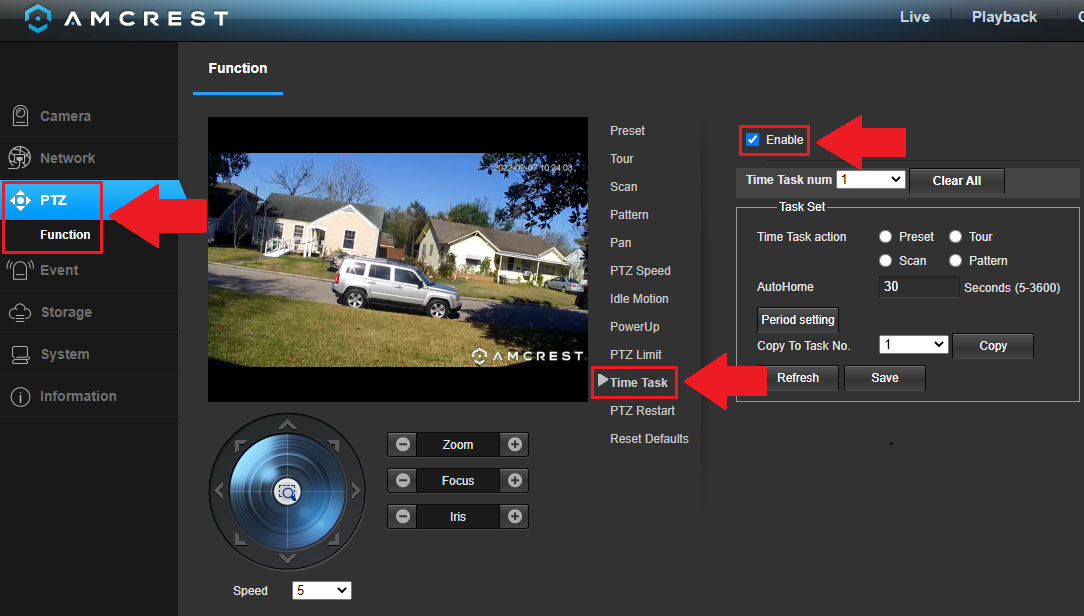
Step 3: The camera can support up to 4 separate time task presets which can ultimately be applied to 4 separate time task actions. Select a time task number from the time task num dropdown menu.
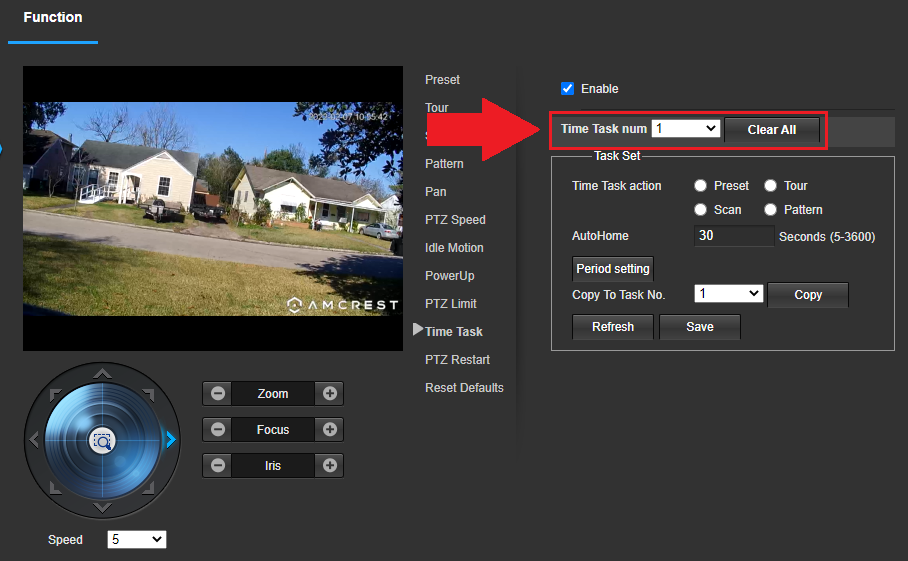
Note: If you would like to clear any time task settings, select a time task number from the dropdown menu and click Clear All.
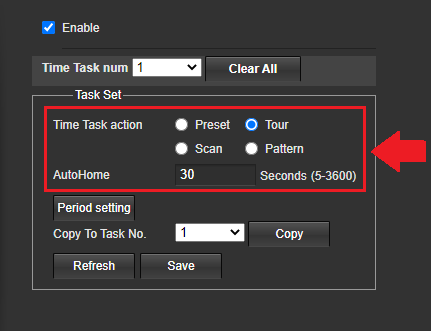
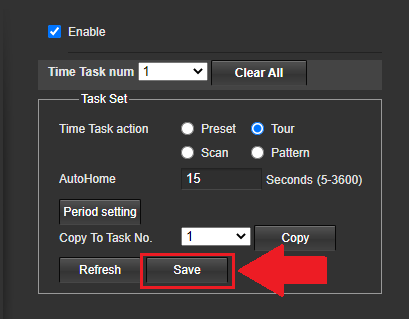
Step 4: Select a preset in which the time task will apply. If you want the time task to automatically return to a specific position in a certain period of time, enter the value in the AutoHome field. This option is set to default every 30 seconds; however, this can be adjusted from 5 ~ 3600 seconds.
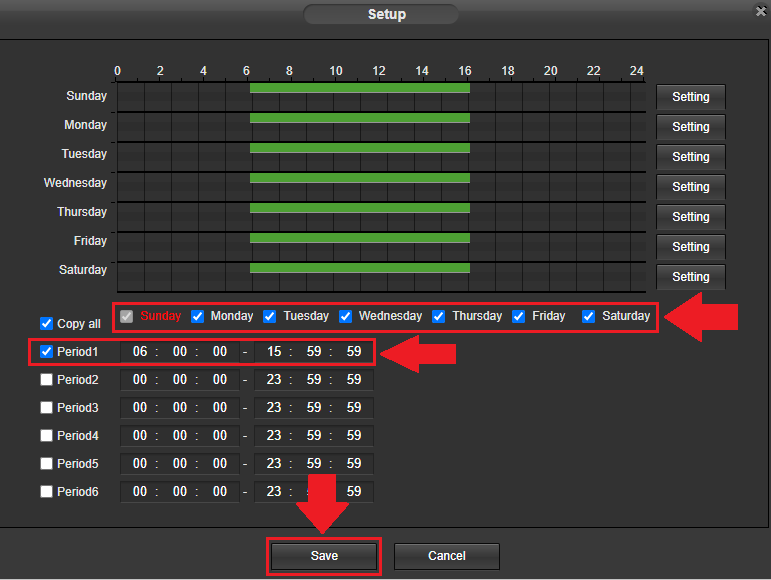
Step 5: To schedule a time for this action to occur, click on the Period setting option. Select the days in which the preset will apply and set a time for each period if applicable. The camera can support up to 6 periods for this setting. Click Save.
Step 6: Click Save.
Note: If you would like the schedule to apply to other time task presets, select the Copy To Task No. dropdown menu and select which preset will apply.
Comments
Please sign in to leave a comment.